Connect to a Linux instance from Windows
Having completed the prerequisites and obtained connection information, you can use one of the following 4 methods to connect to the Linux instance from Windows.
Please note that you can connect to the instance only when its state is Ready.
1. Built-in Command Prompt
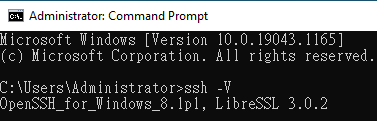
Step 1. Make sure the SSH program is installed
Open your local command prompt and type ssh -V to check if you have an SSH client program on your local computer. If so, the version of the program will be displayed. If not, please refer to the Microsoft official document for a quick installation of OpenSSH Client, or refer to other connection methods.
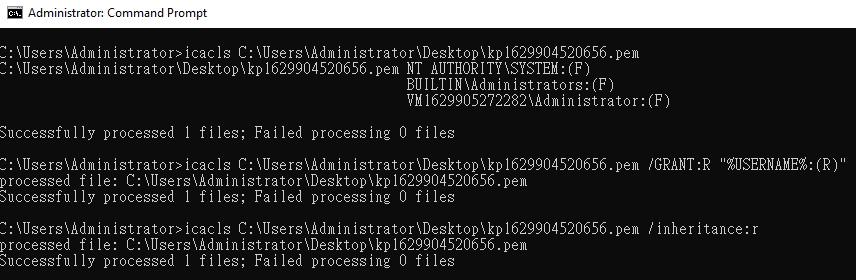
Step 2. Change the permissions of the key pair
Follow the steps in Prerequisites to obtain the connection information and enter commands to change the key pair permissions.
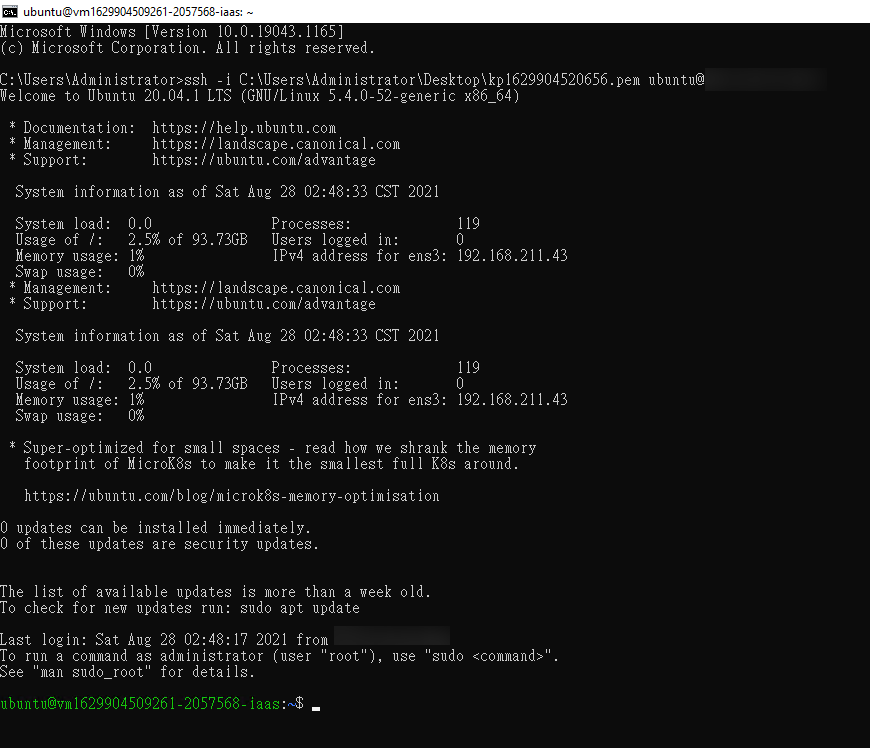
Step 3. Connect to your VCS instance
Enter the commands obtained by following the Prerequisites to SSH into your instance.
2. Third-party software: MobaXterm
MobaXterm's graphical user interface is intuitive and easy to use. The key pair can be used directly without conversion.
Step 1. Download MobaXterm
Please download the MobaXterm Home Edition (Portable edition), unzip it, and run MobaXterm_Personal_[version].

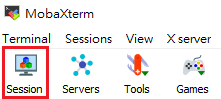
Step 2. Create a connection
Click Session in the upper left corner.
Follow the diagram and steps to complete the settings and establish a connection:
- Click SSH
- Enter public IP in
Remote host - Enter ubuntu or centos in
Specify username - Click Advanced SSH settings
- Check
Use private key - Click on the folder and select your key pair
.pemfile - Click OK to establish the connection
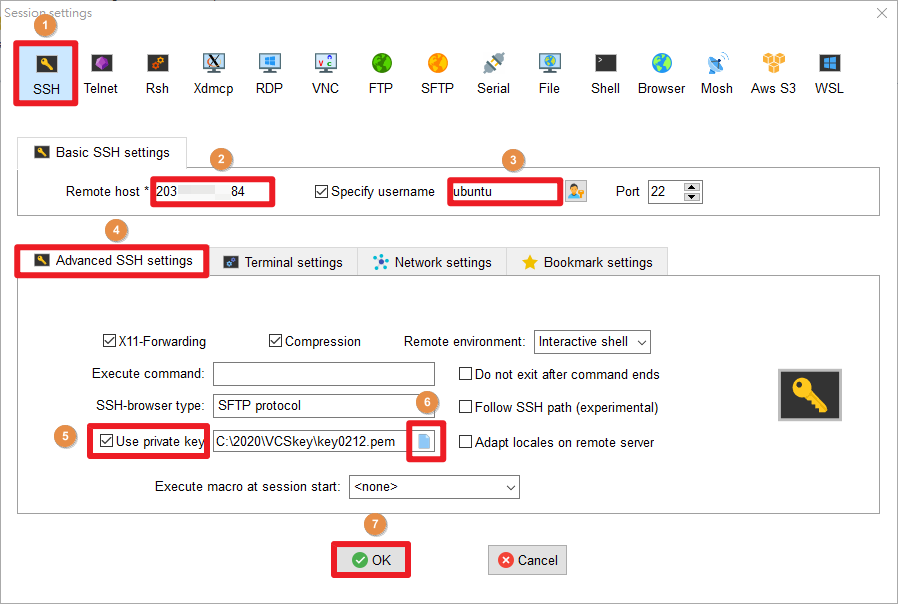
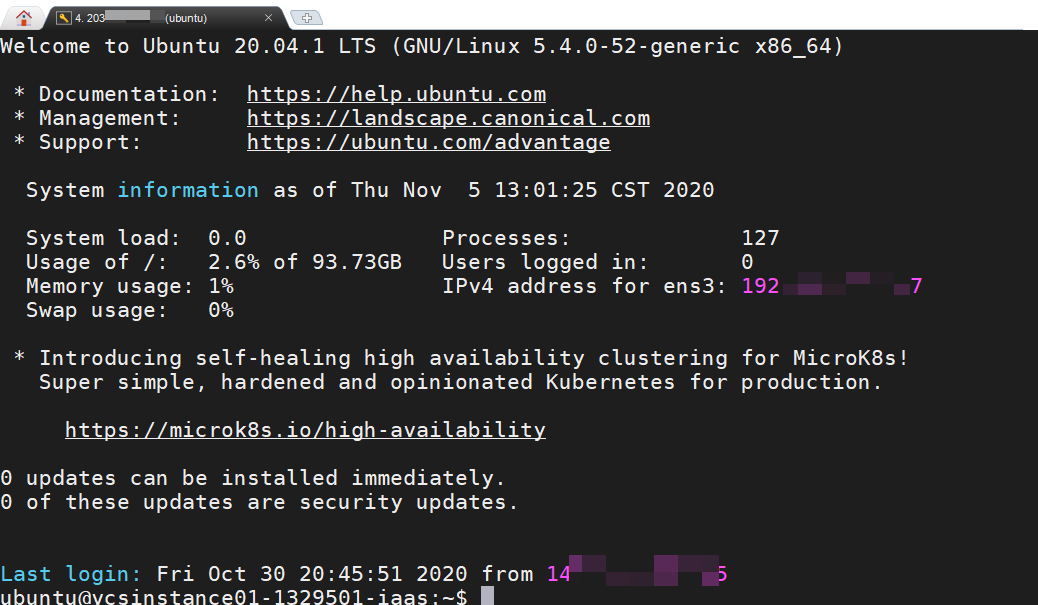
Connection established!
3. Third-party software: PuTTY
PuTTY does not support the key pair format .pem , so please convert the .pem file to .ppk using PuTTYgen.
Step 1. Download and install PuTTY
Please download PuTTY and complete the installation.
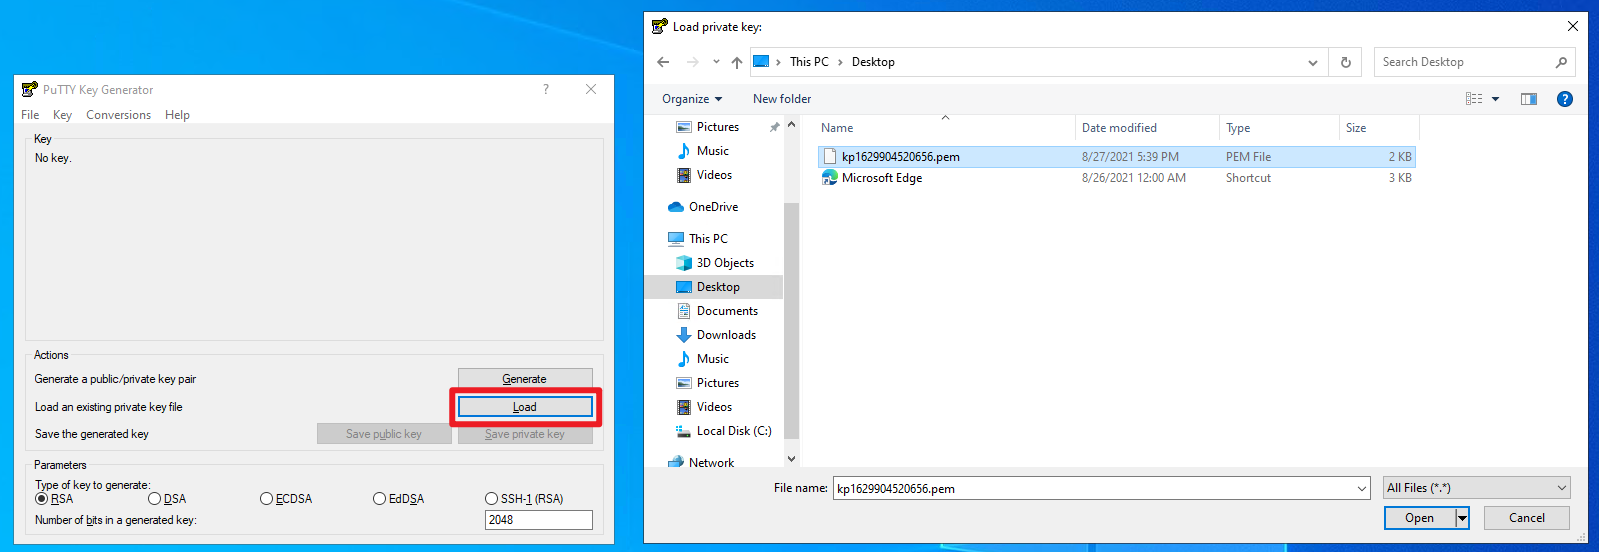
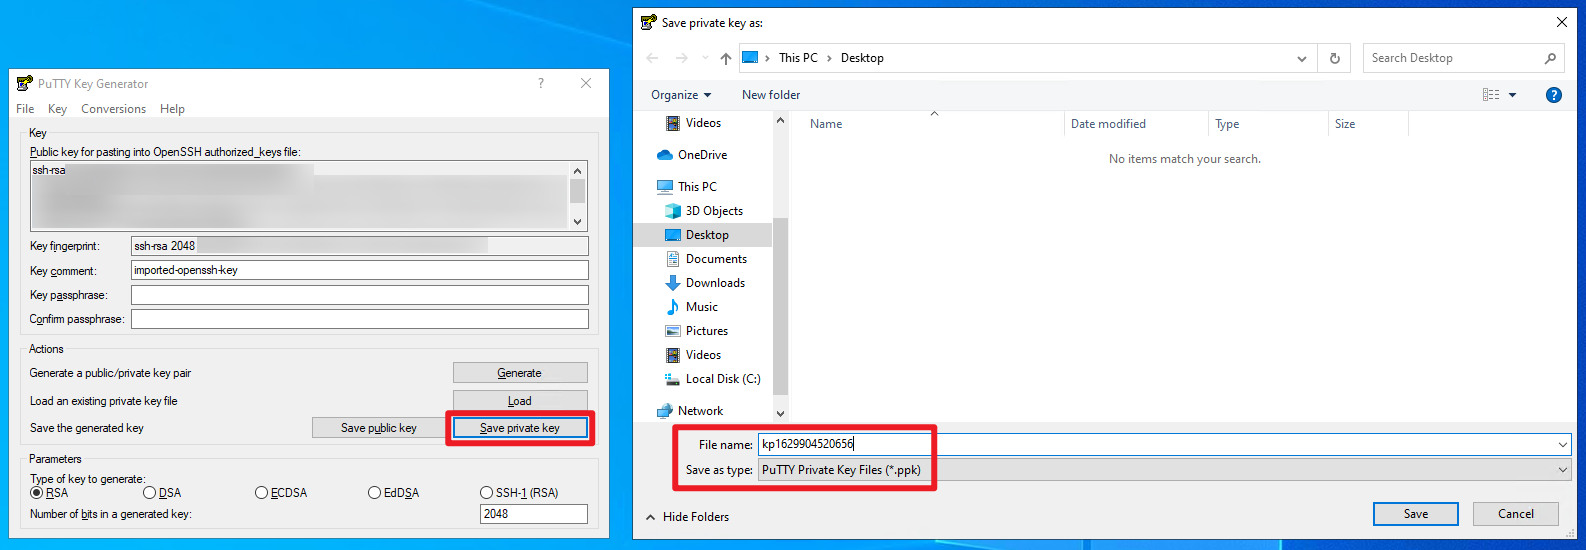
Step 2. Convert the key pair (.pem> .ppk)
- Open PuTTYgen.

- Click Load and select the key pair of the
.pemfile you have created and downloaded.
- Click OK.
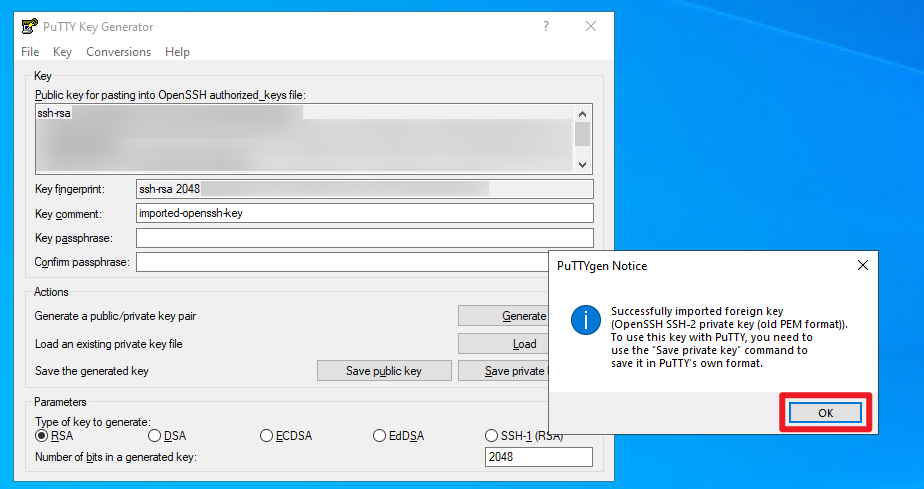
- Click Save private key, enter the file name, make sure the format is
.ppk, and save your settings to complete the conversion.
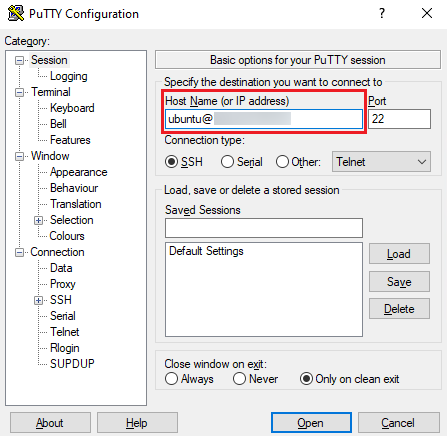
Step 3. Connect to the instance using PuTTY
- Open PuTTY

- Click Session on the left, enter the Host Name (can be found by clicking the Connect on the configuration page) and Port (22)
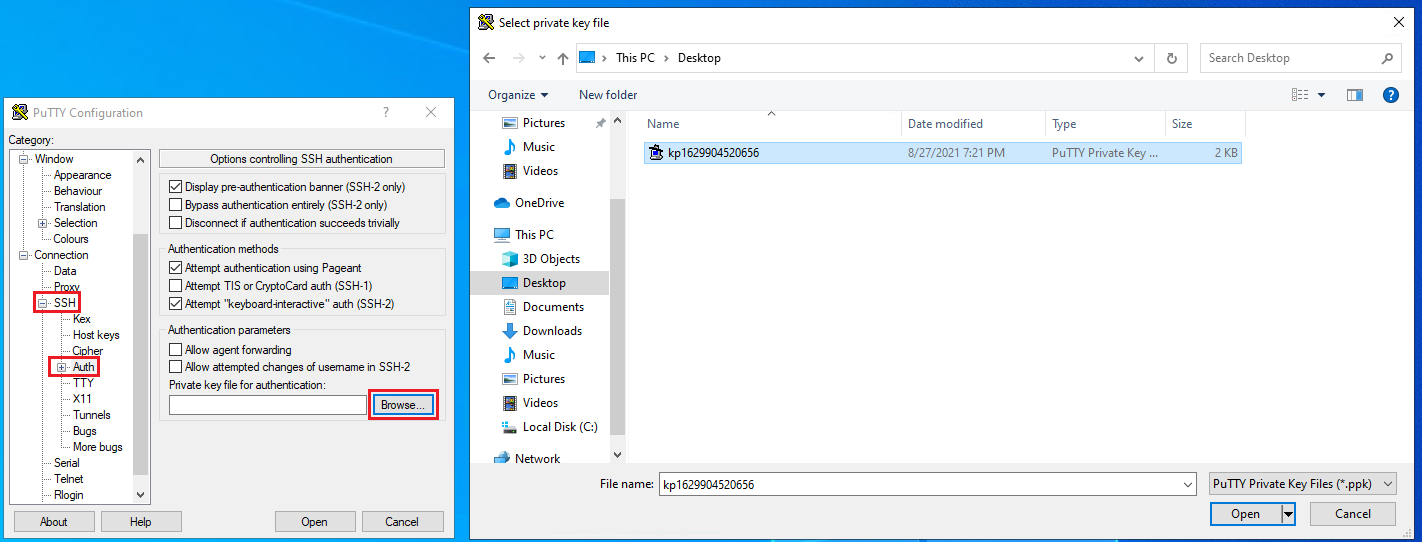
- Then click SSH > Auth on the left, and click Browse to load the
.ppkkey pair.
- Last, click Open.
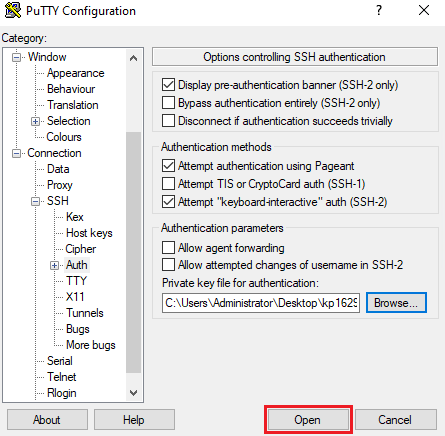
- Successfully connect to the VCS instance when the window opens.

4. Third-party software: VScode
If you are already using VScode to develop your program, you may directly using it to connect to your VCS instance. VScode supports a variety of platforms and has many plug-in software packages that are easy to install and suitable for novices. For complete instructions, please refer to the Official documentation.
Step 1. Download and install VScode
Please download VScode and open the application.

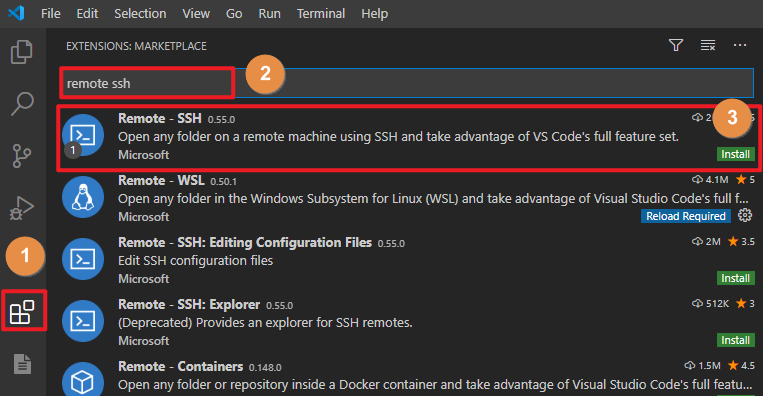
Step 2. Install SSH extension
Click Extensions > search for remote ssh > select Remote- SSH and click Install.
Step 3. Create config file
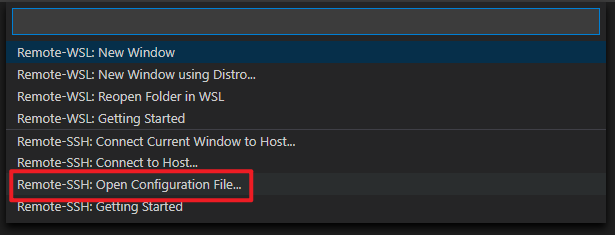
- After the installation is complete, click the icon in the lower left corner of the window to open the remote connection.

- Select Remote-SSH: Open Configuration File.
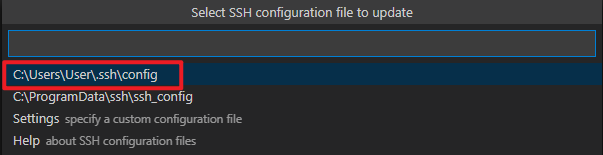
- Select C:\Users\User.ssh\config to create a connection profile
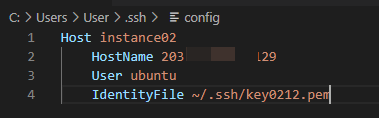
- Please place the key pair pem file under the
~/.ssh/folder

- After opening the config file, copy and paste the following format, and fill in the information of a VCS instance; if there are multiple instances, you can copy and paste several for modification. Save the file when finished.
Host <INSTANCE_NAME>            # Enter the name of the VCS instance
    HostName <PUBLIC_IP>        # Enter Public IP
    User <IMAGE_TYPE>           # Enter ubuntu or centos
    IdentityFile ~/.ssh/<.pem>  # Enter .pem key pair name
Step 4. Connect to the VCS instance
- In VScode, click the icon in the lower left corner > select Remote-SSH: Connect to Host....
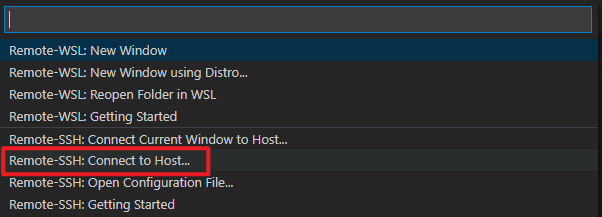
- It will show the instance information that have been created, click on it to start the connection.

- Then select Linux.

- Select Continue.

- When the connection is successful, the
SSH: <Host Name>will appear in the lower left corner of the window.

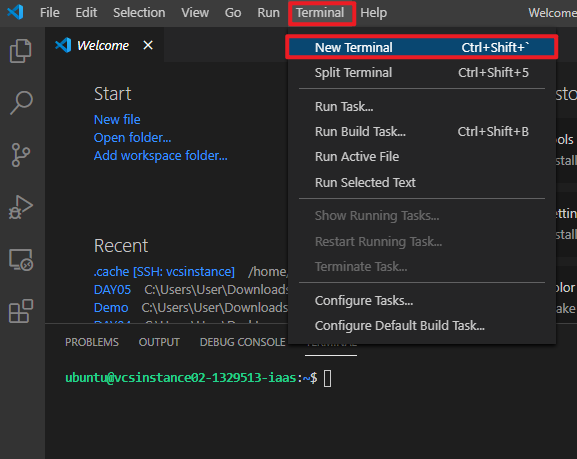
- Then open Terminal > New Terminal to use the VCS instance!
For urgent debugging/system maintenance, it is recommended to connect via Console to speed up the workflow.
After connecting to the Linux instance:
- If you have attached the data disk in the file
/etc/fstab(e.g.,/dev/vdb /mnt ext4 defaults), we suggest you addnofailafter the configuration (for example:/dev/vdb /mnt ext4 defaults,nofail,x-systemd.device-timeout=1m) to make sure that your instances can start and connect normally. - You will not be able to connect to VCS instance once the settings of the network interface card are modified. Therefore, we strongly discourage you from changing the NIC settings. Please beware when operating and deploying.