Basic Virtual Firewall
Basic Virtual Firewall (BVF) provides a simple and flexible architecture that builds virtual network firewalls to protect all the VCS instances inside.
For the permission differences between a Tenant Admin and a Tenant User when using VCS instances, please refer to User roles and permissions.
Create a firewall
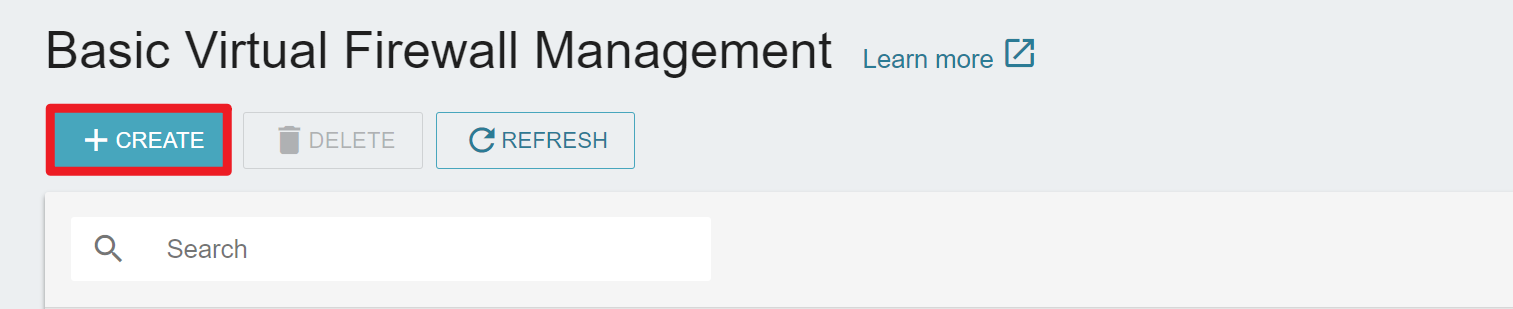
- Under Services, select Basic Virtual Firewall (BVF), and select +CREATE on the Basic Virtual Firewall Management page.
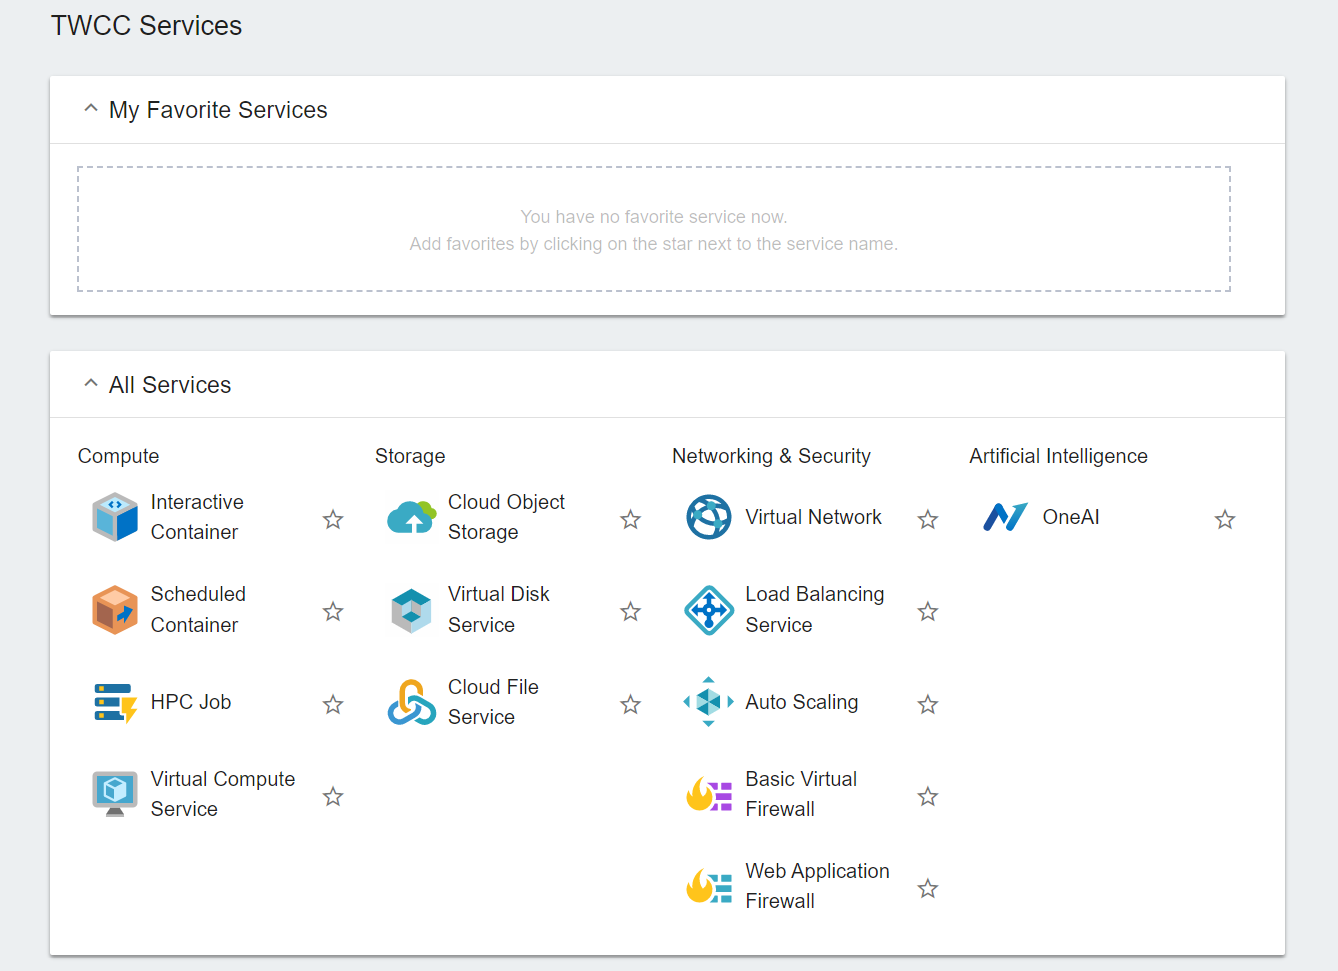
You can click on the asterisk to the left of the service in "All Services" and pin your frequently used services to "My Favorite Services" to speed up the process.
- Enter a name for the firewall, and then click NEXT: RULE.
You can skip this step if you have already created the required rules via Security Group. After selecting the NETWORK, select the VCS instance IP in ADVANCEDRULE to synchronize the Security Group rules to the firewall automatically.
- Click CREATERULE.
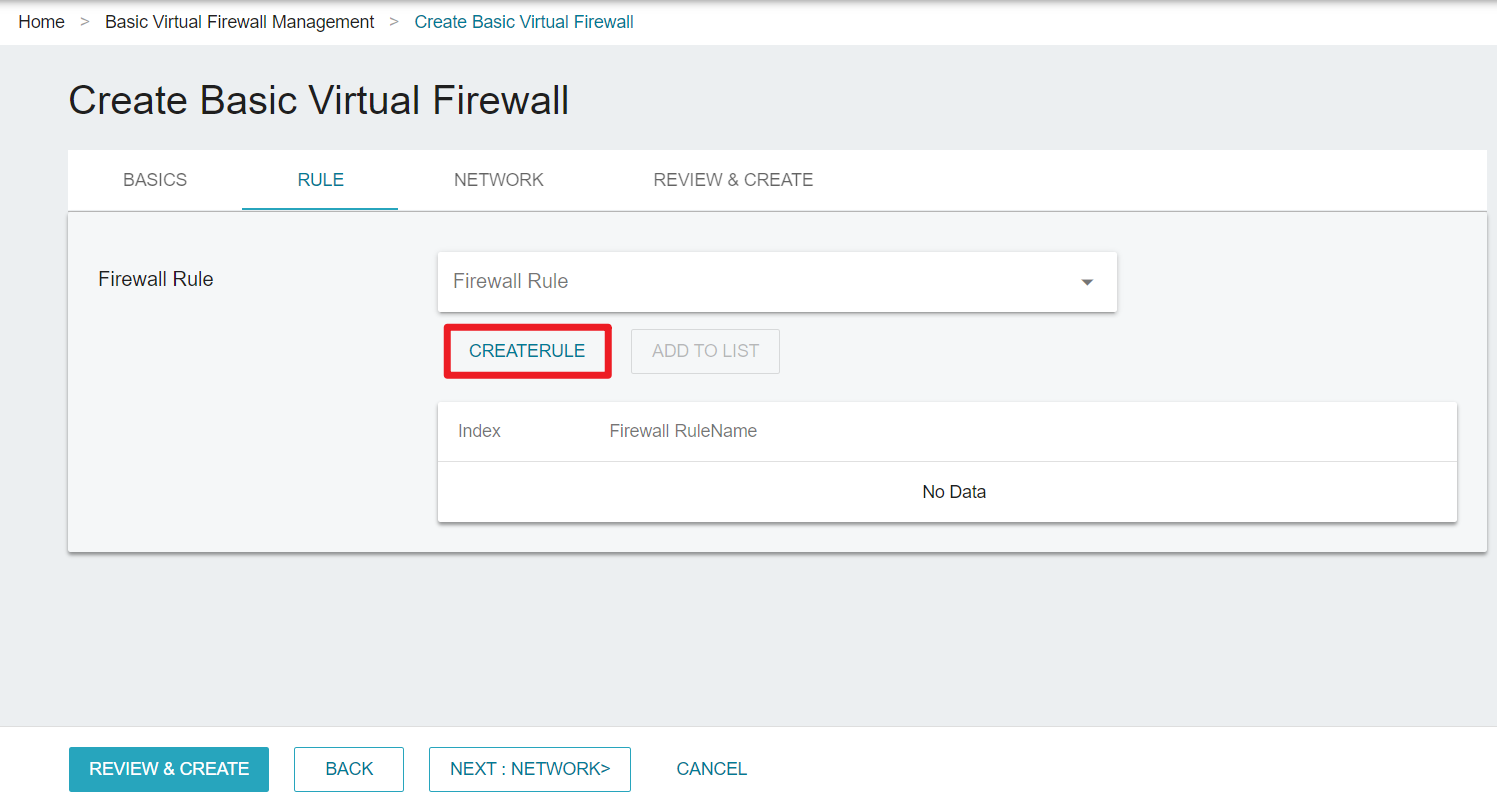
Please note that the limit for creating firewall rules is 30 times per minute. If this limit is exceeded, the creation will fail.
- In Create Virtual Network Firewall Rule pop-up window, configure the firewall rules, and click OK when finished.
- Name: Enter a name for the firewall rule
- Action: Select the required firewall action, such as allow, deny, reject
- Protocol: Select tcp, icmp or udp
- Destination IP: Enter the IP address of the destination host
- Destination port: Enter the destination port
- Source IP: Enter the source IP address
- Source port: Enter the source port
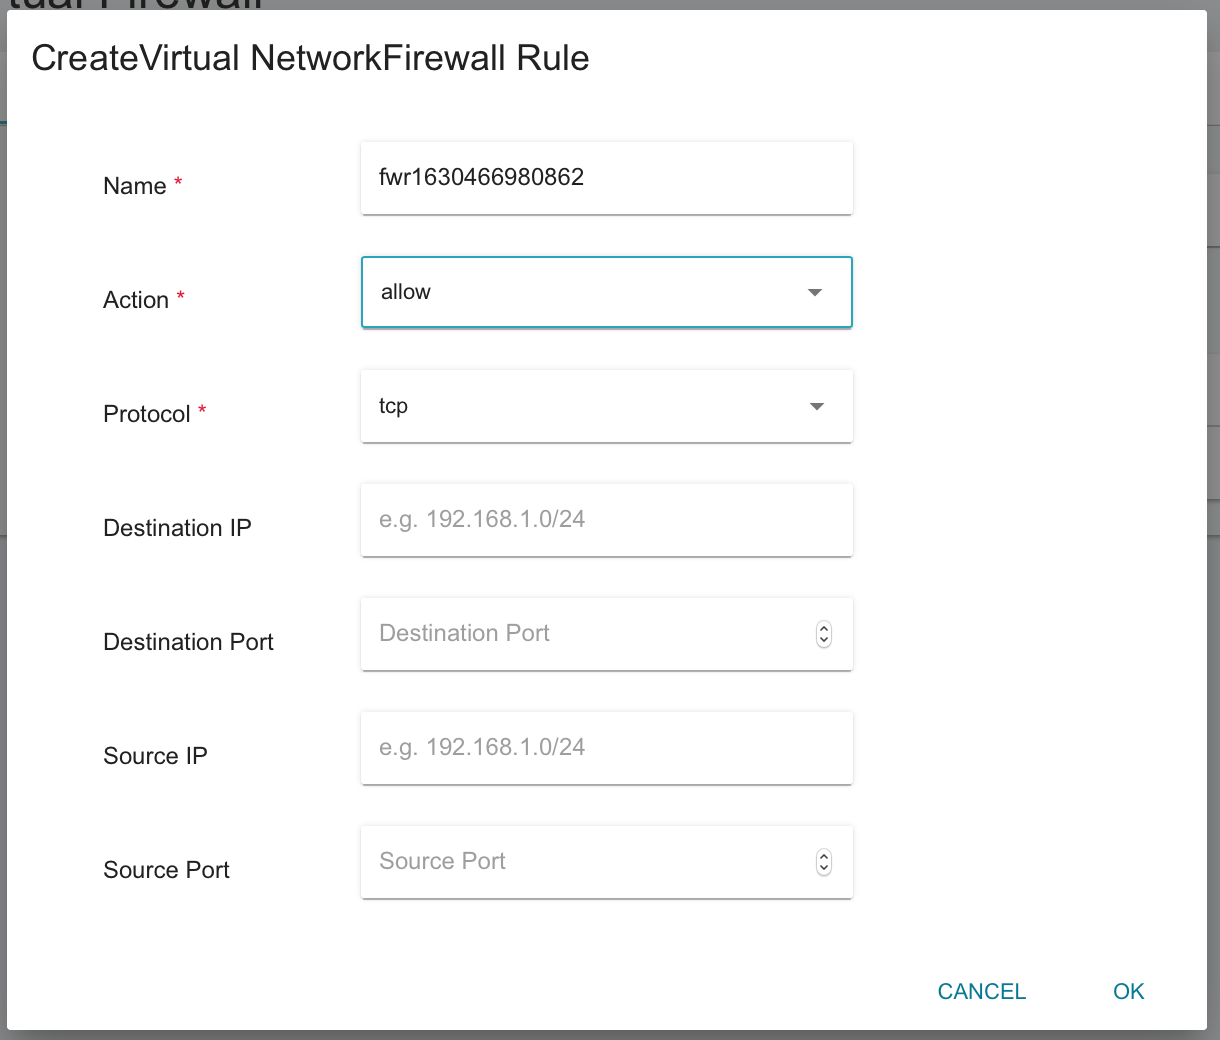
If configured without specifying, the default is Any for destination IP, destination port, source IP, and source port.
- Go back to Create Basic Virtual Firewall page, you can see the rule you just created, and then click ADD TO LIST.
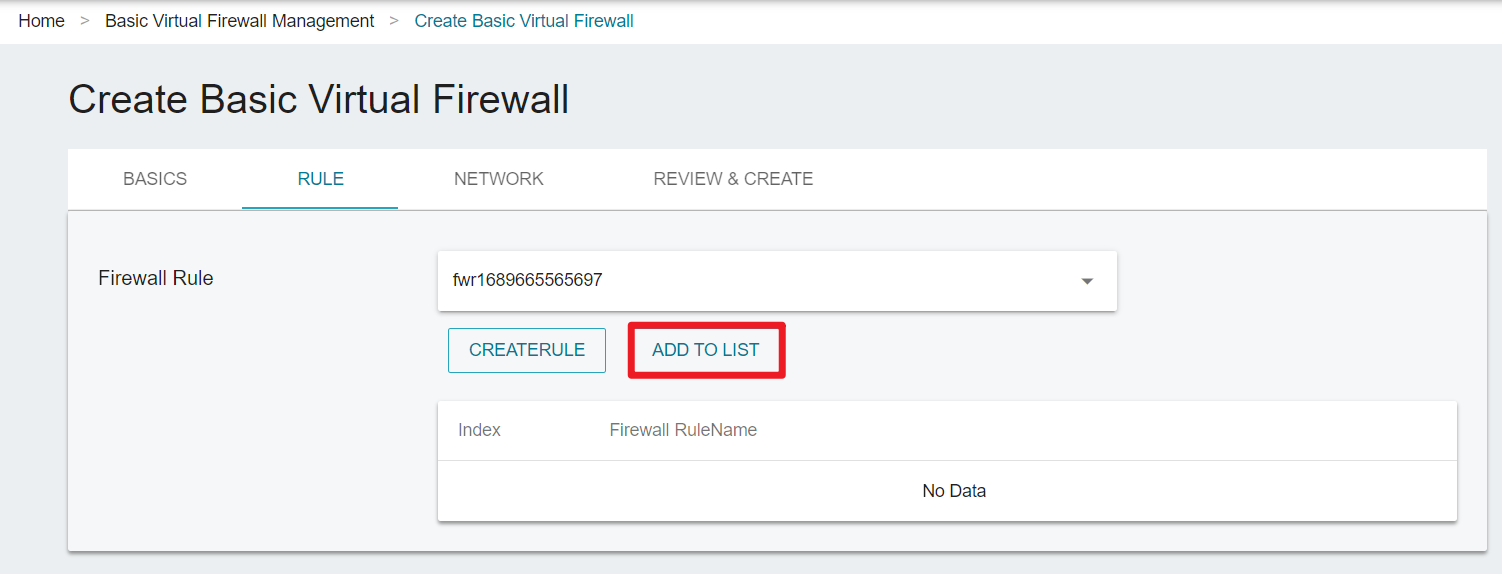
- Once added to the list, the firewall rule will be displayed to the list below.
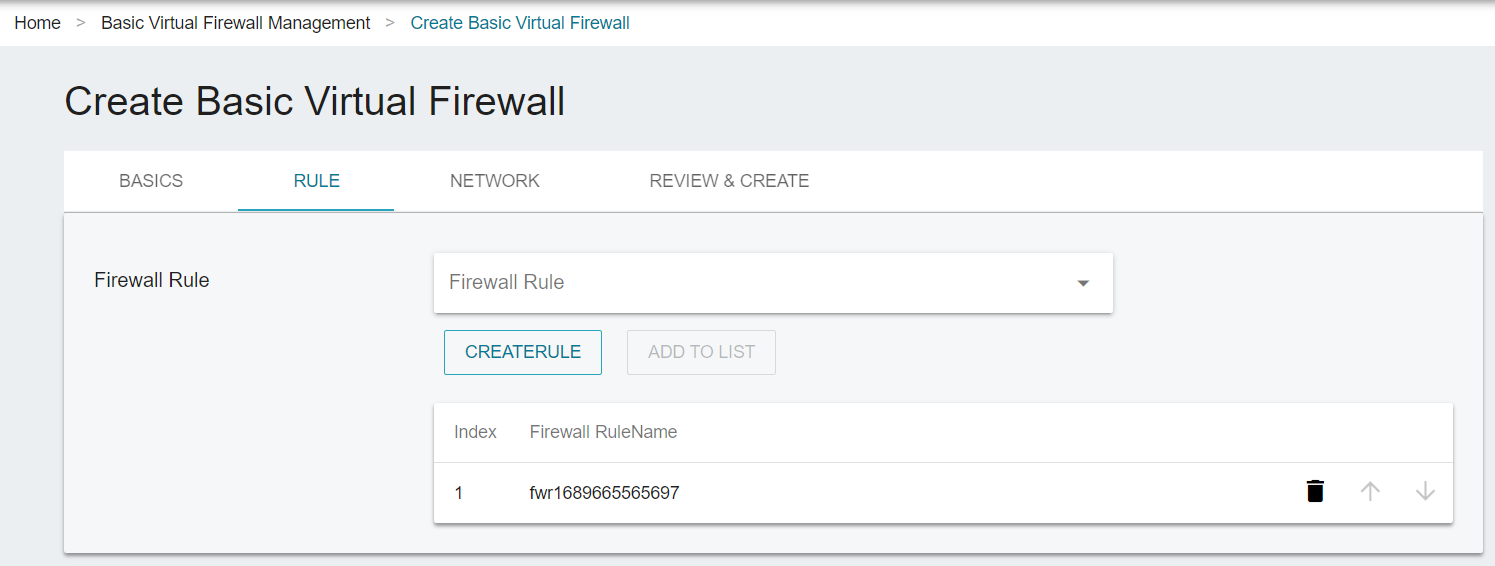
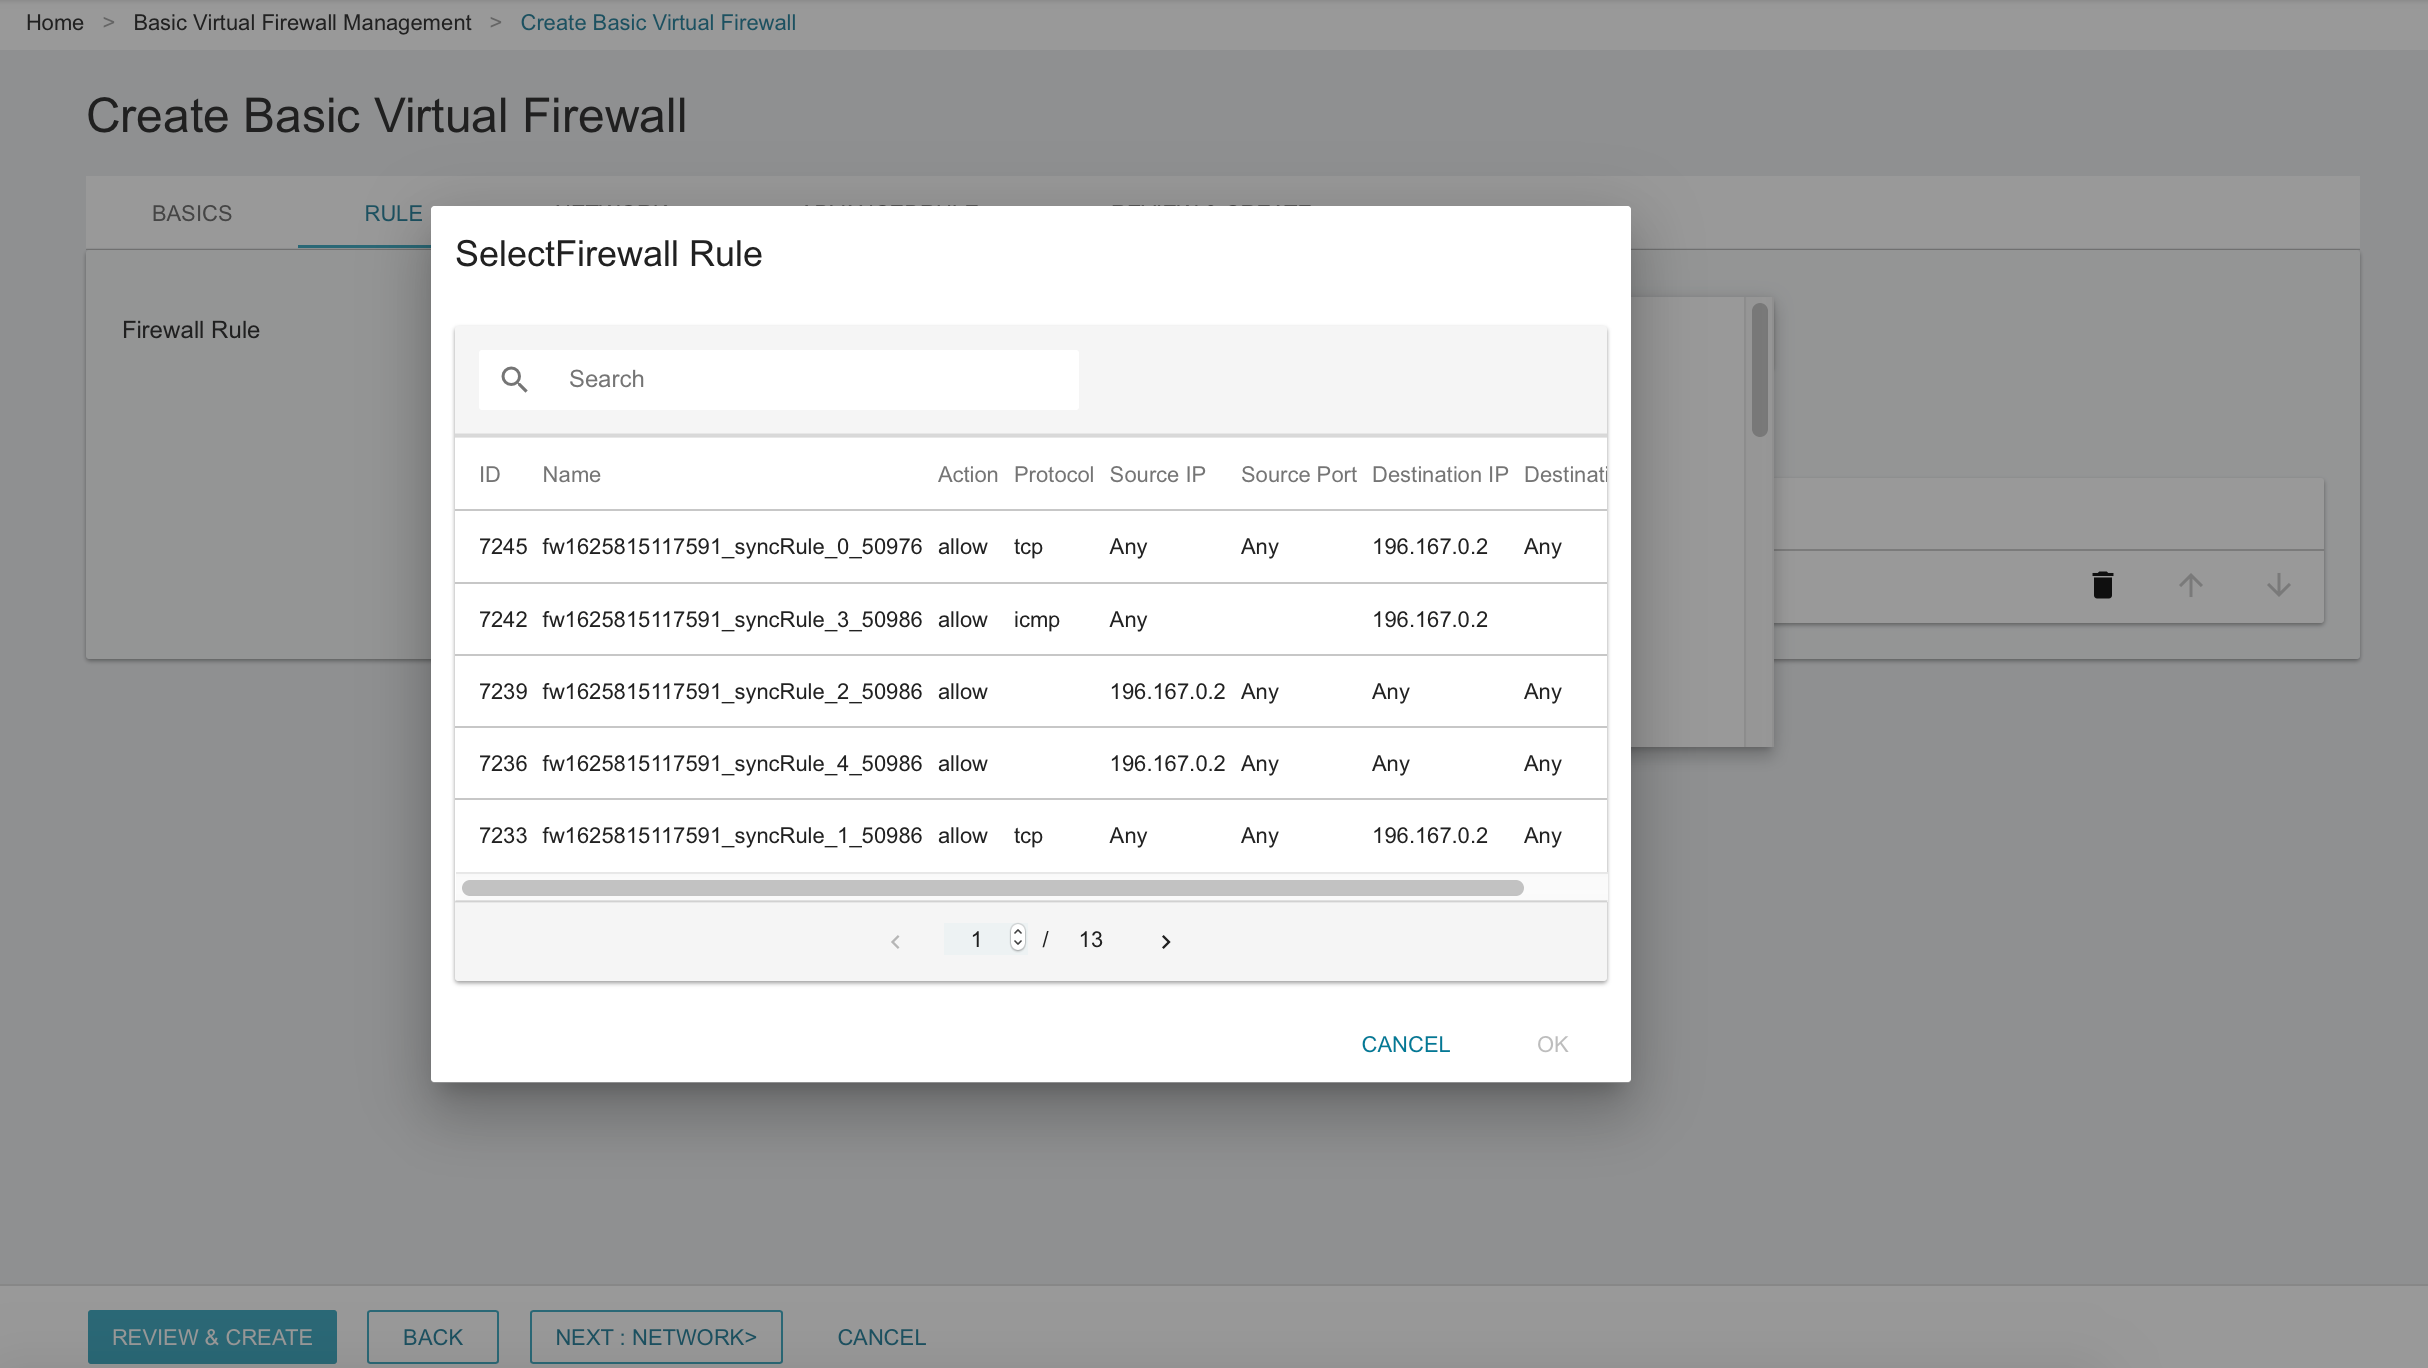
- Repeat the above steps to create more firewall rules you need. You can also click the firewall rule list to select other firewall rules in the project.
- After setting the rules, click the arrow on the right to adjust the priority of the rules. Click NEXT:NETWORK when you are ready.
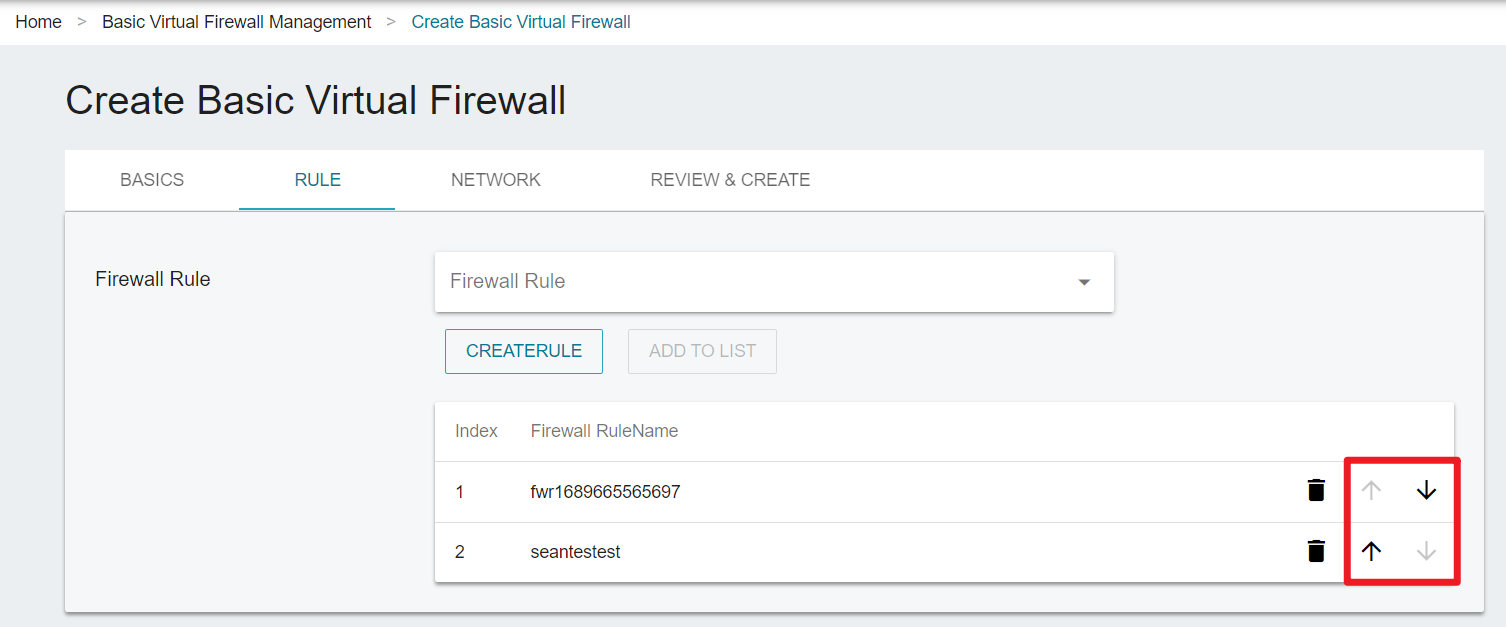
Higher priority rules will override lower priority rules.
If no firewall rule is selected, the system will default the firewall rule to deny all traffic. Therefore, once the firewall is created, it blocks all incoming traffic to any VCS instance within the network.
- After selecting the network, click NEXT: ADVANCEDRULE. In this step, you can synchronize Security Group rules of VCS instances to the firewall, where a corresponding rule is also automatically created (SyncRule).
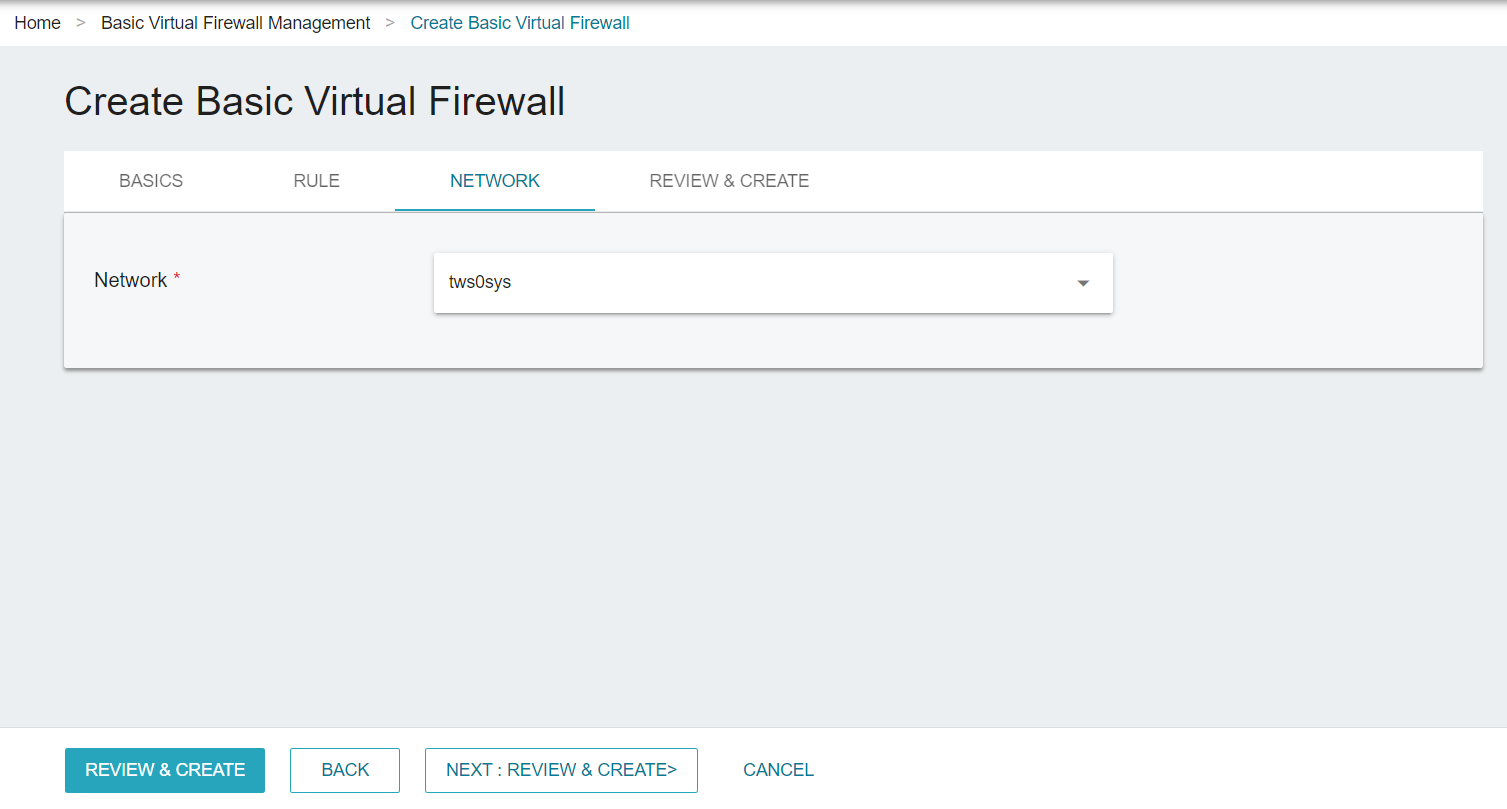
The firewall only applies to the instances in the selected Virtual Network. In other words, the instances not created in the selected Virtual Network will not be protected by the firewall.
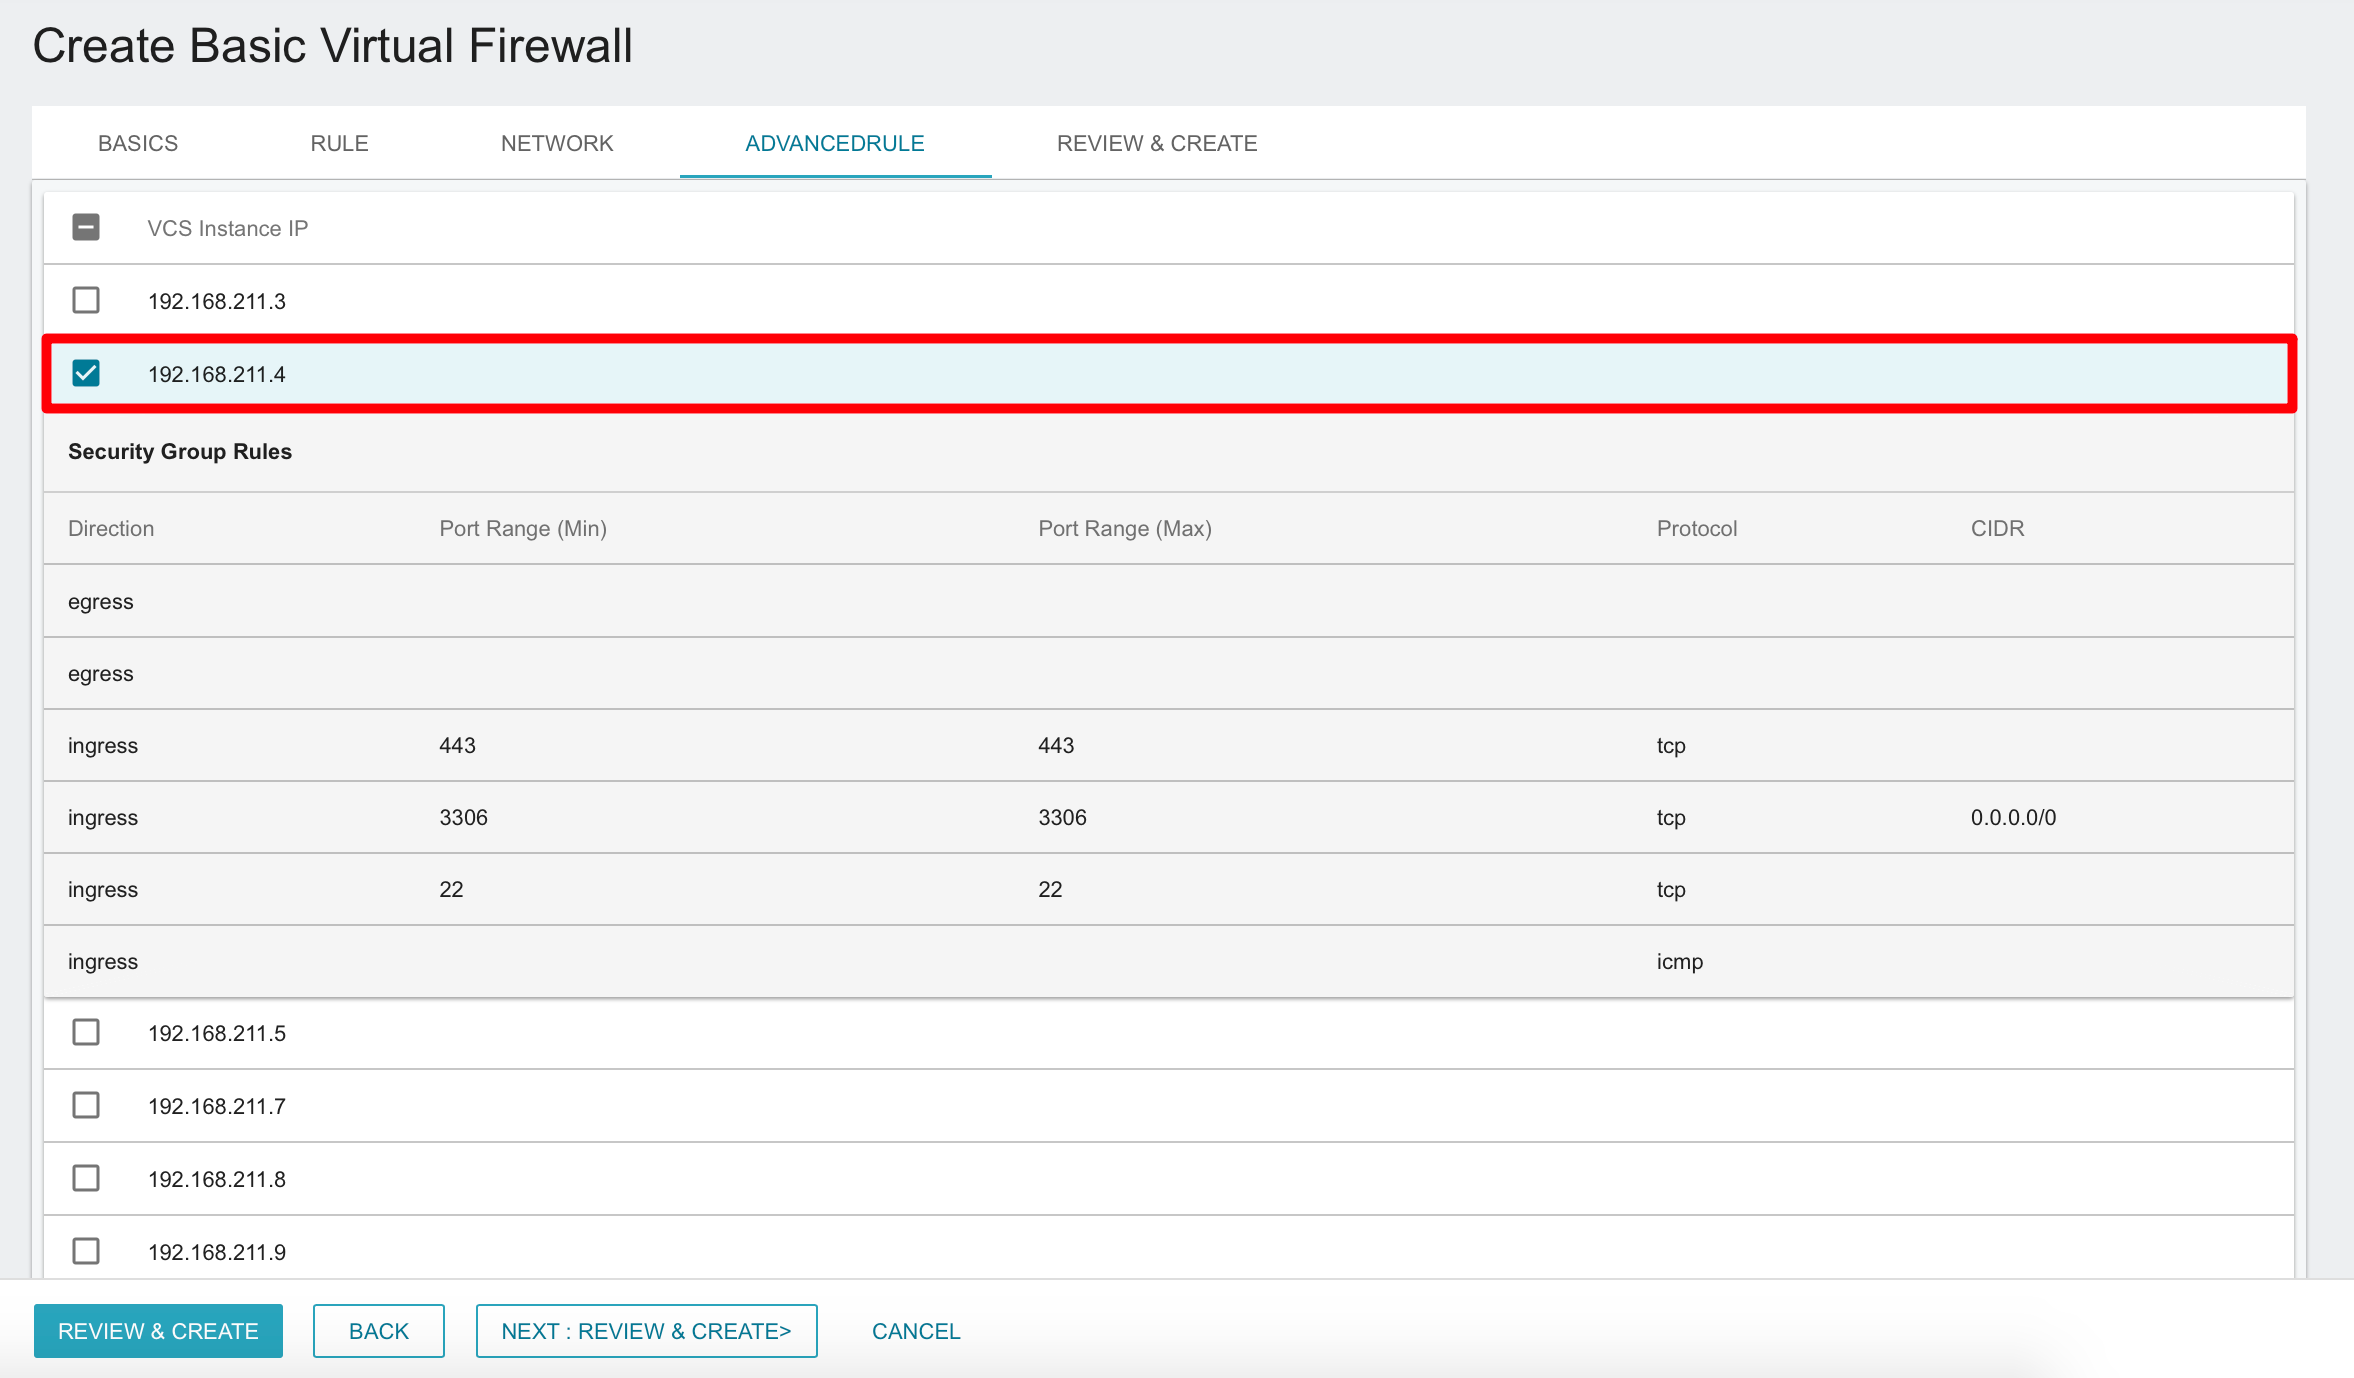
- In ADVANCEDRULE tab, the private IPs of all VCS instances in the Virtual Network are listed.
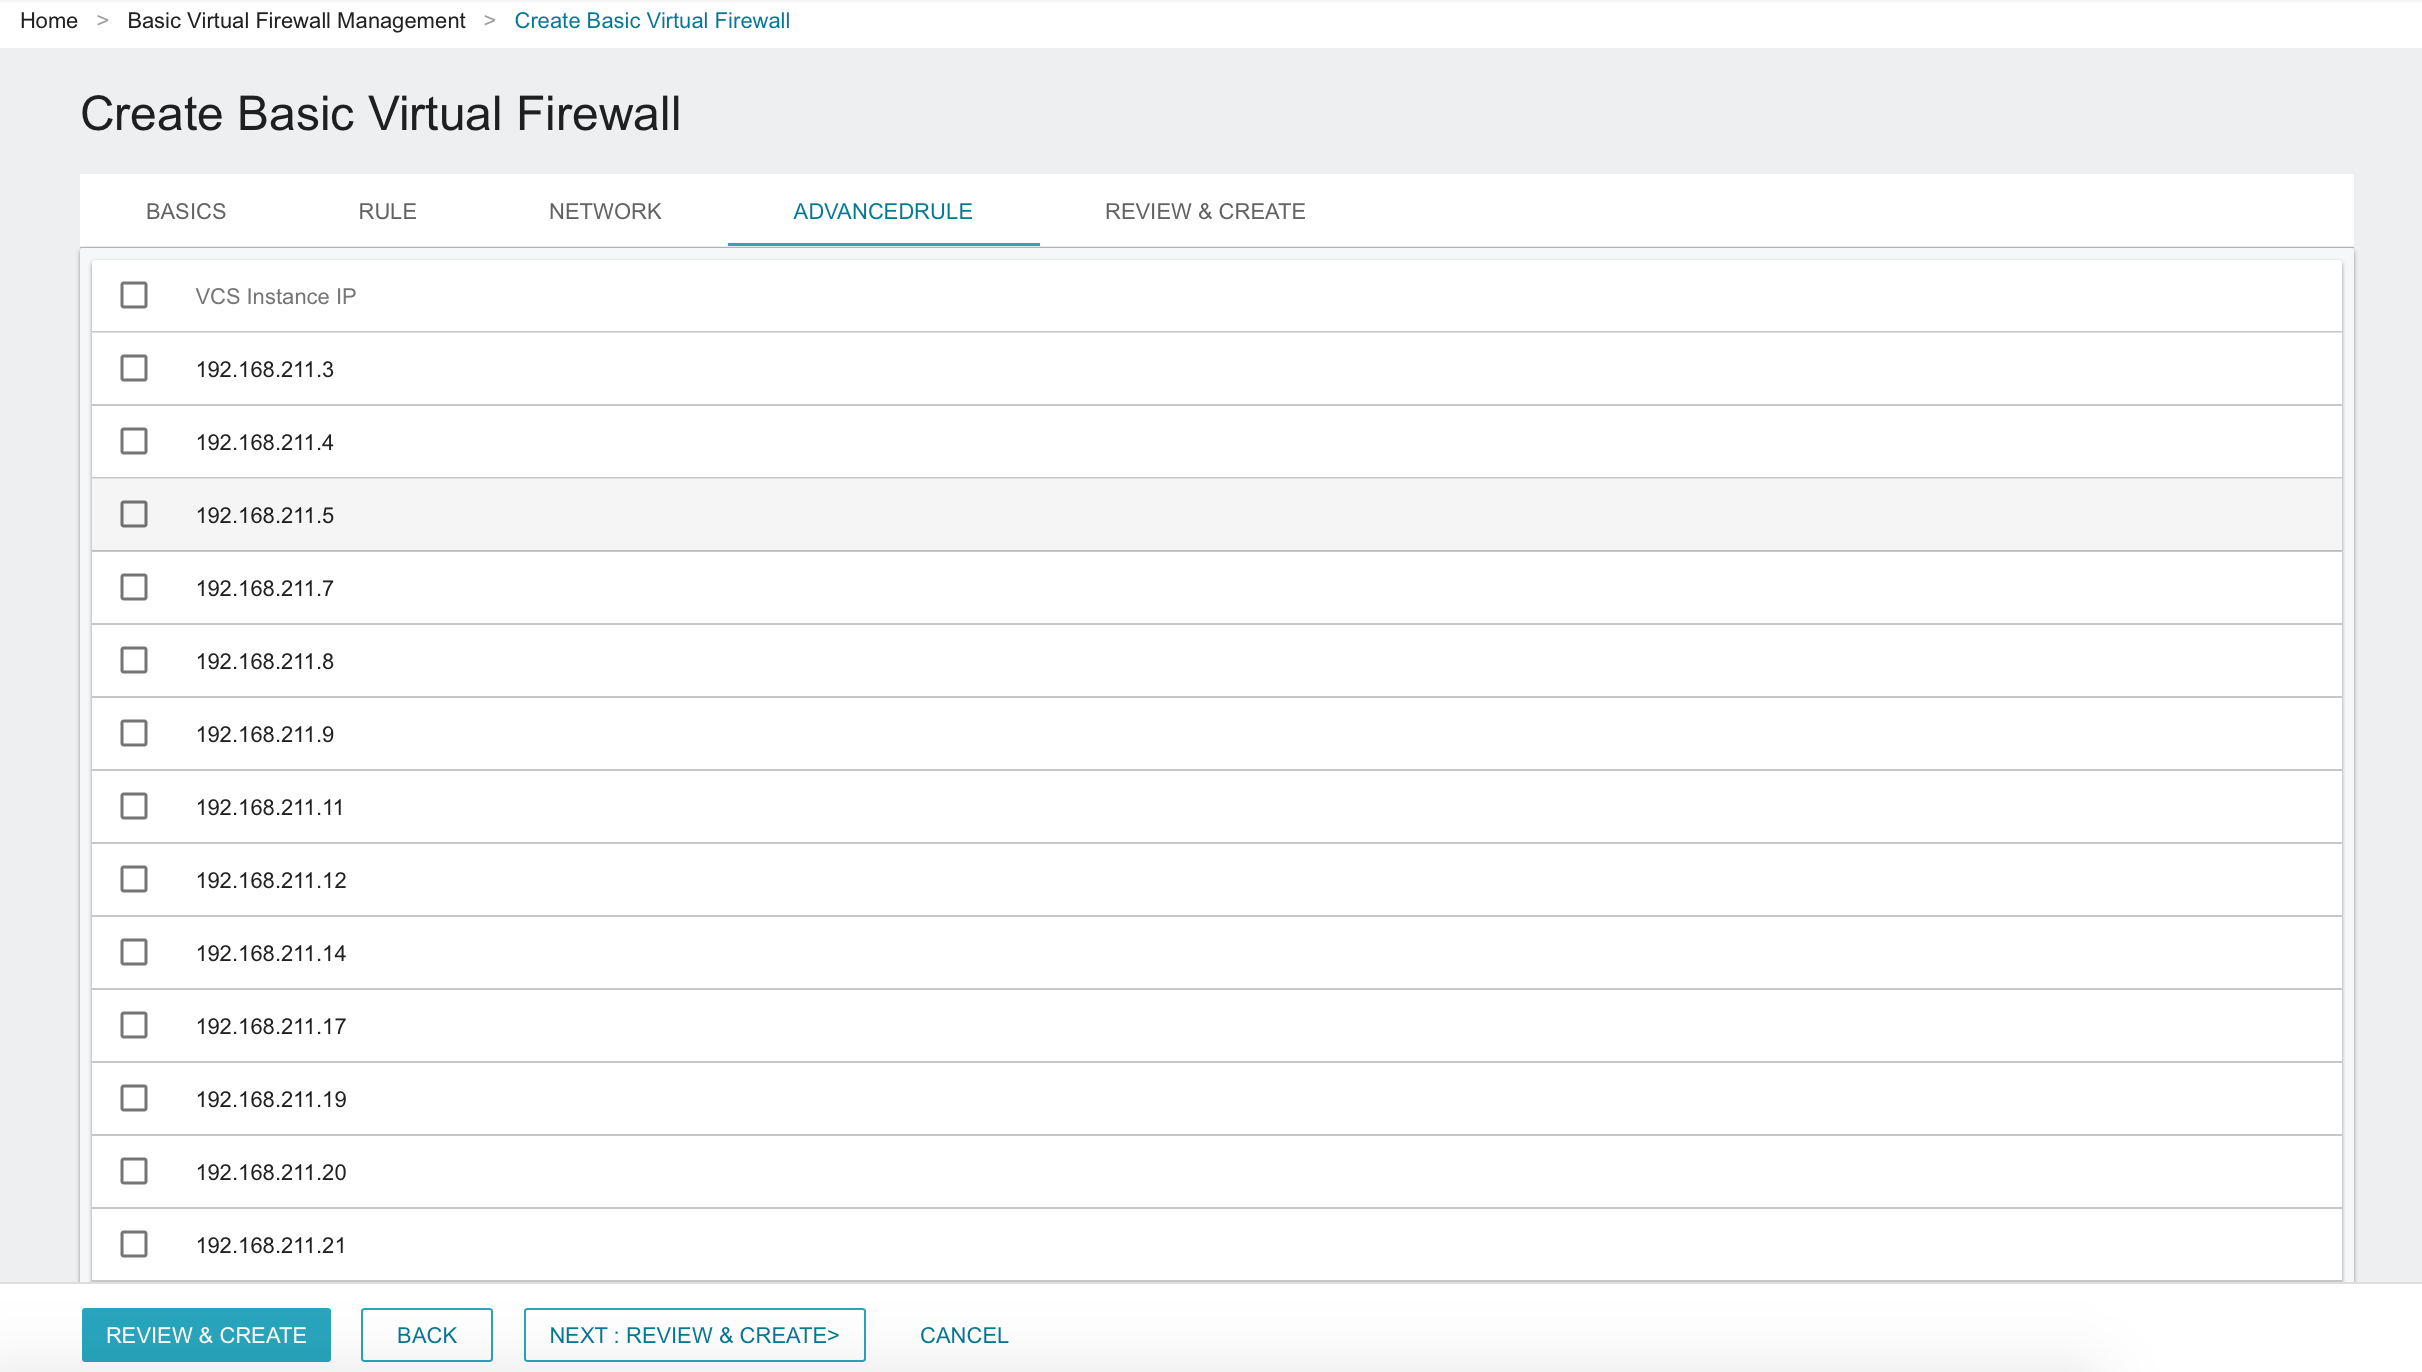
- Click the list to see the Security Groups rules of the VCS instance, and select the rules you need. Then, click NEXT: REVIEW&CREATE.
- Review the configuration of the firewall, then click CREATE to complete the creation.
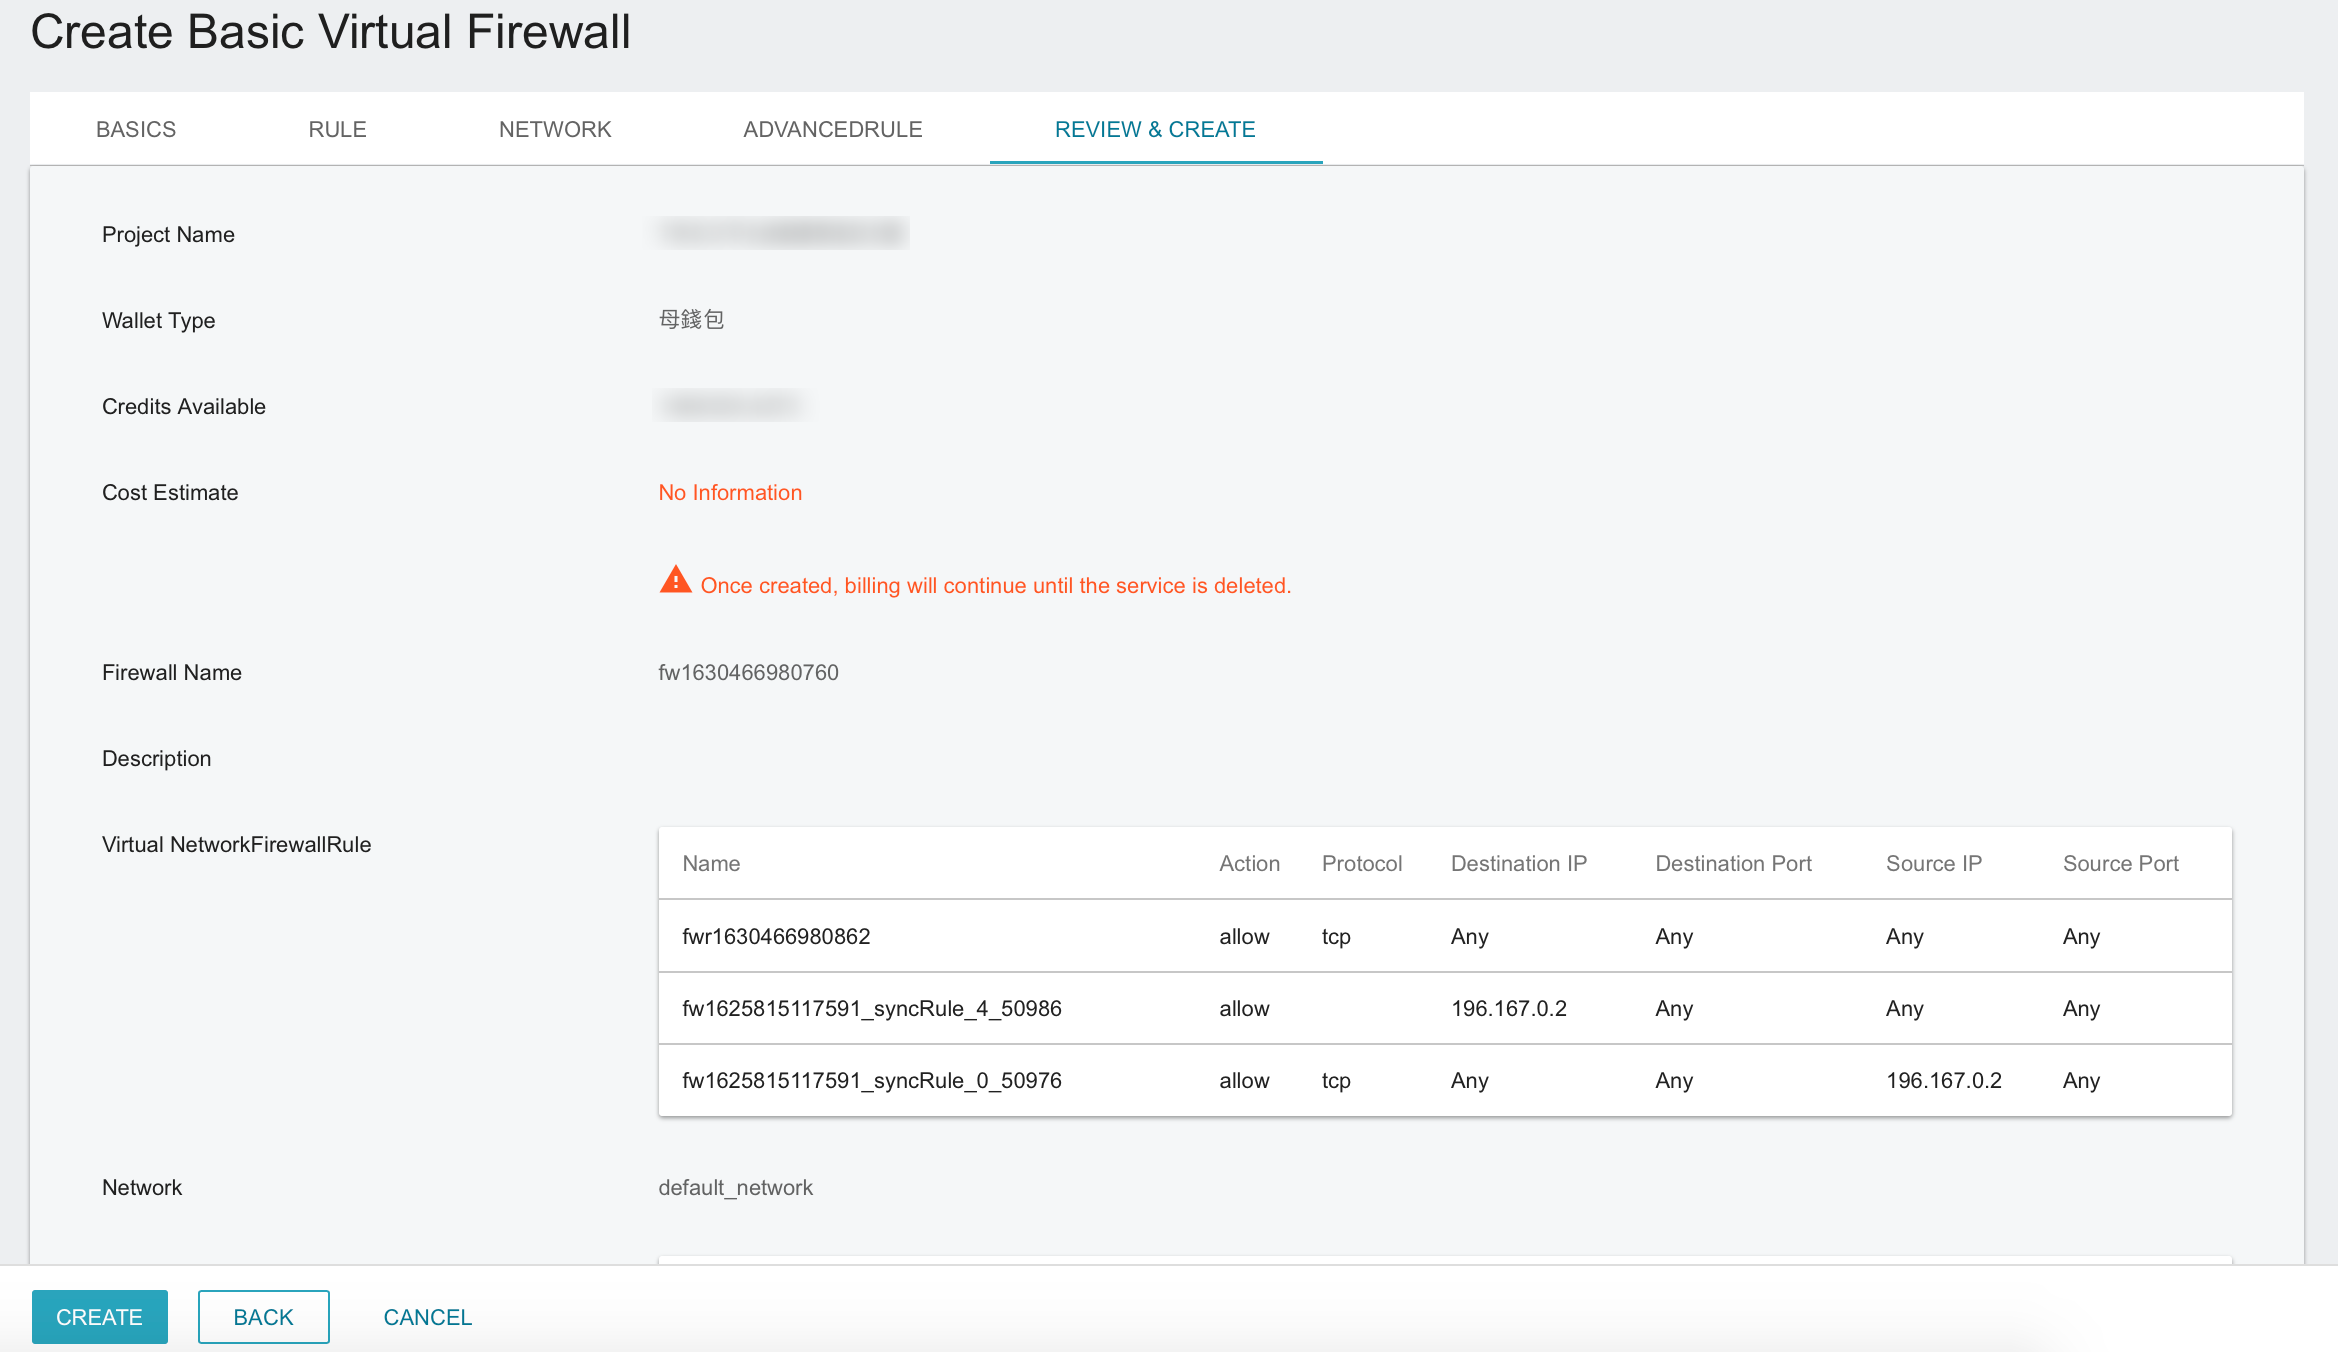
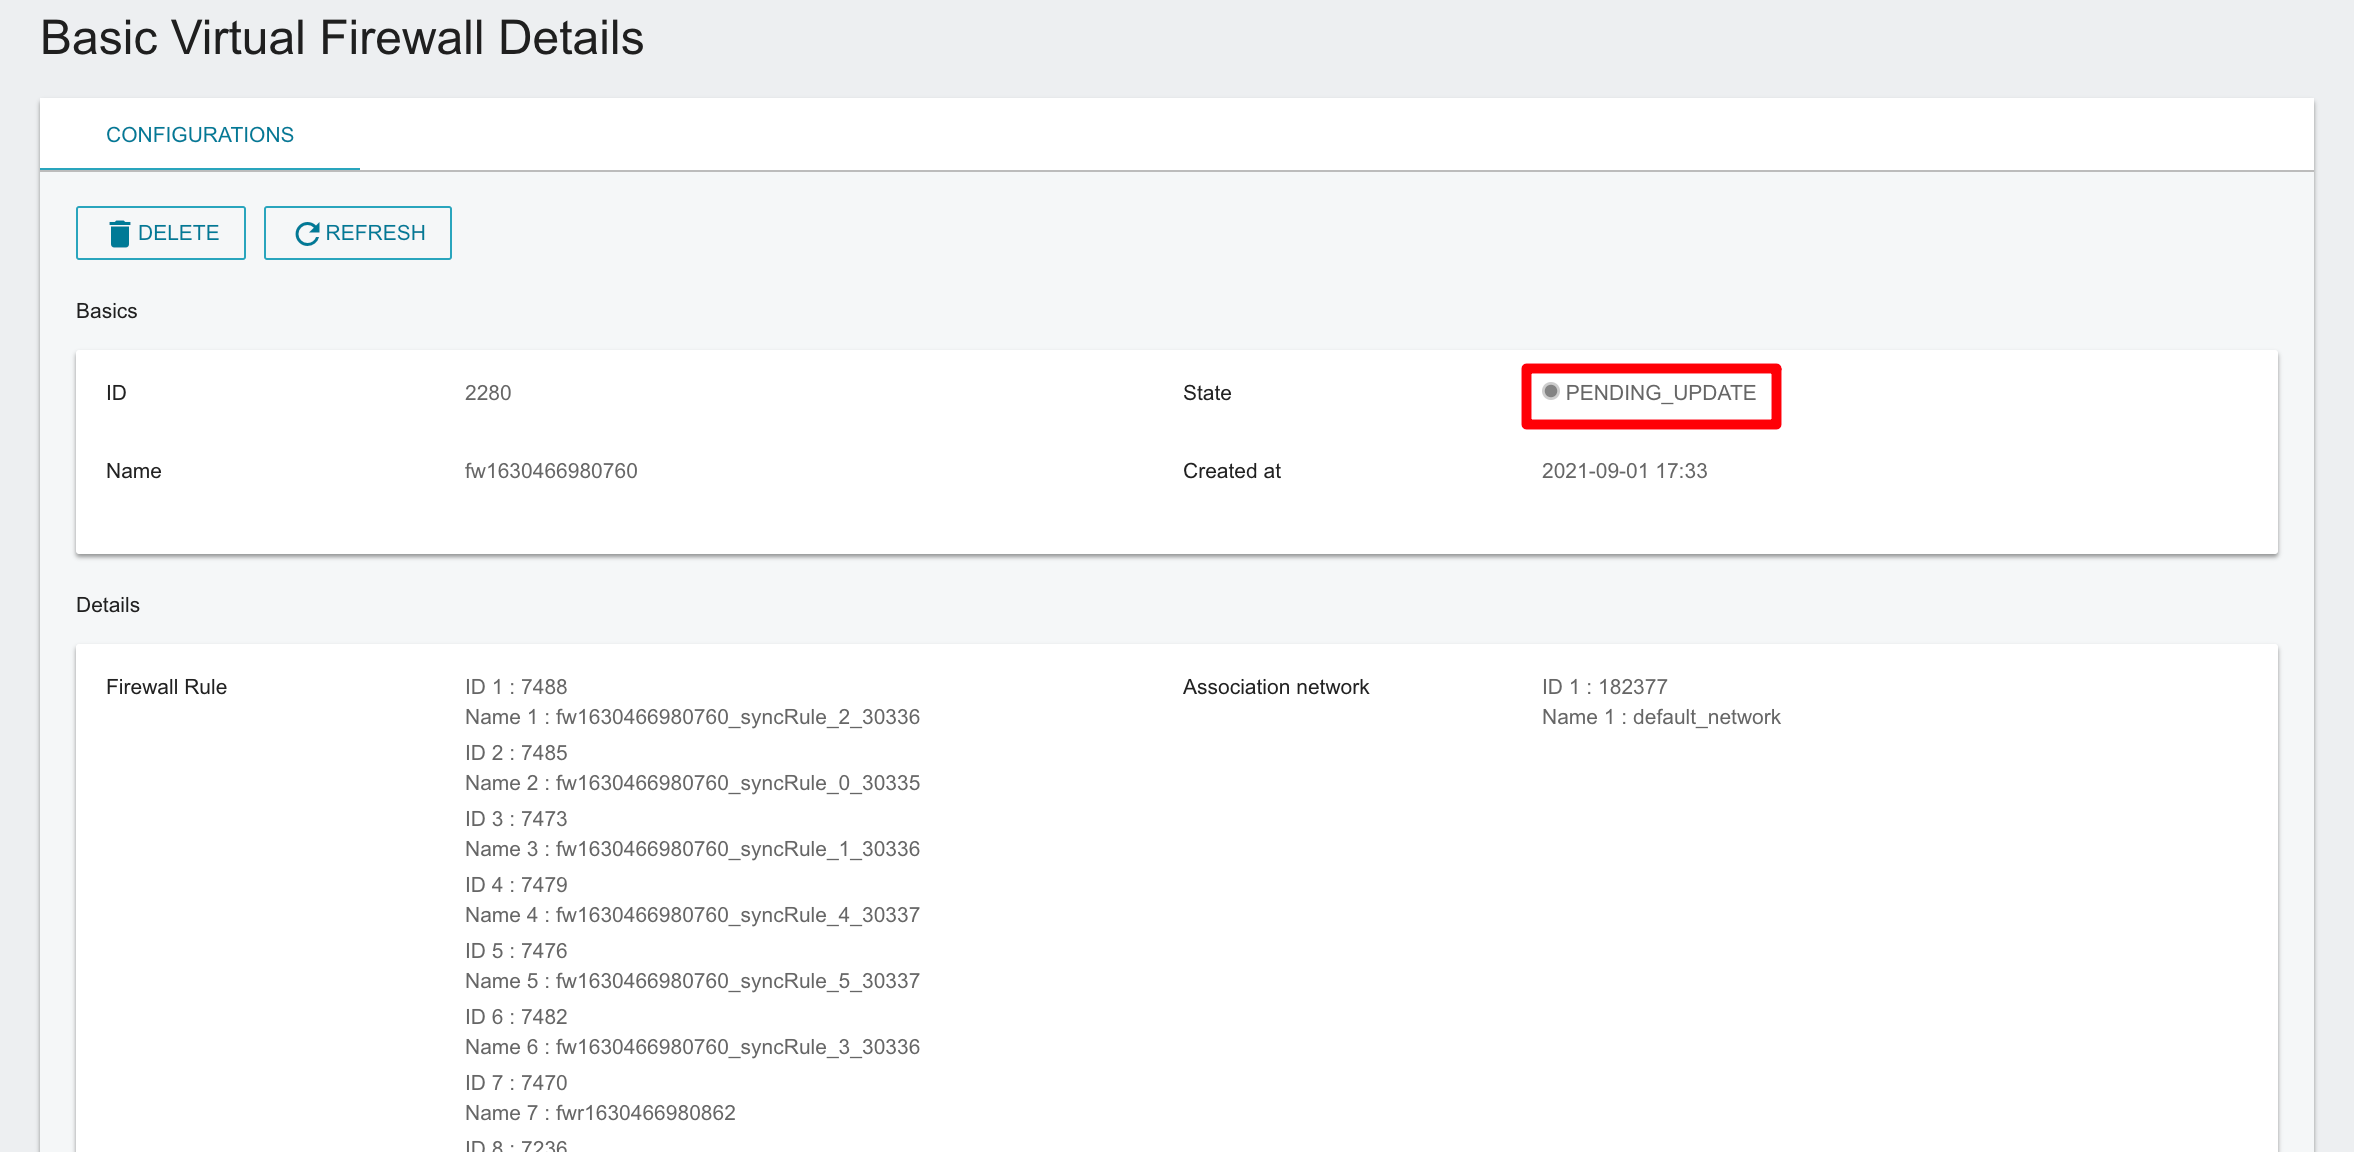
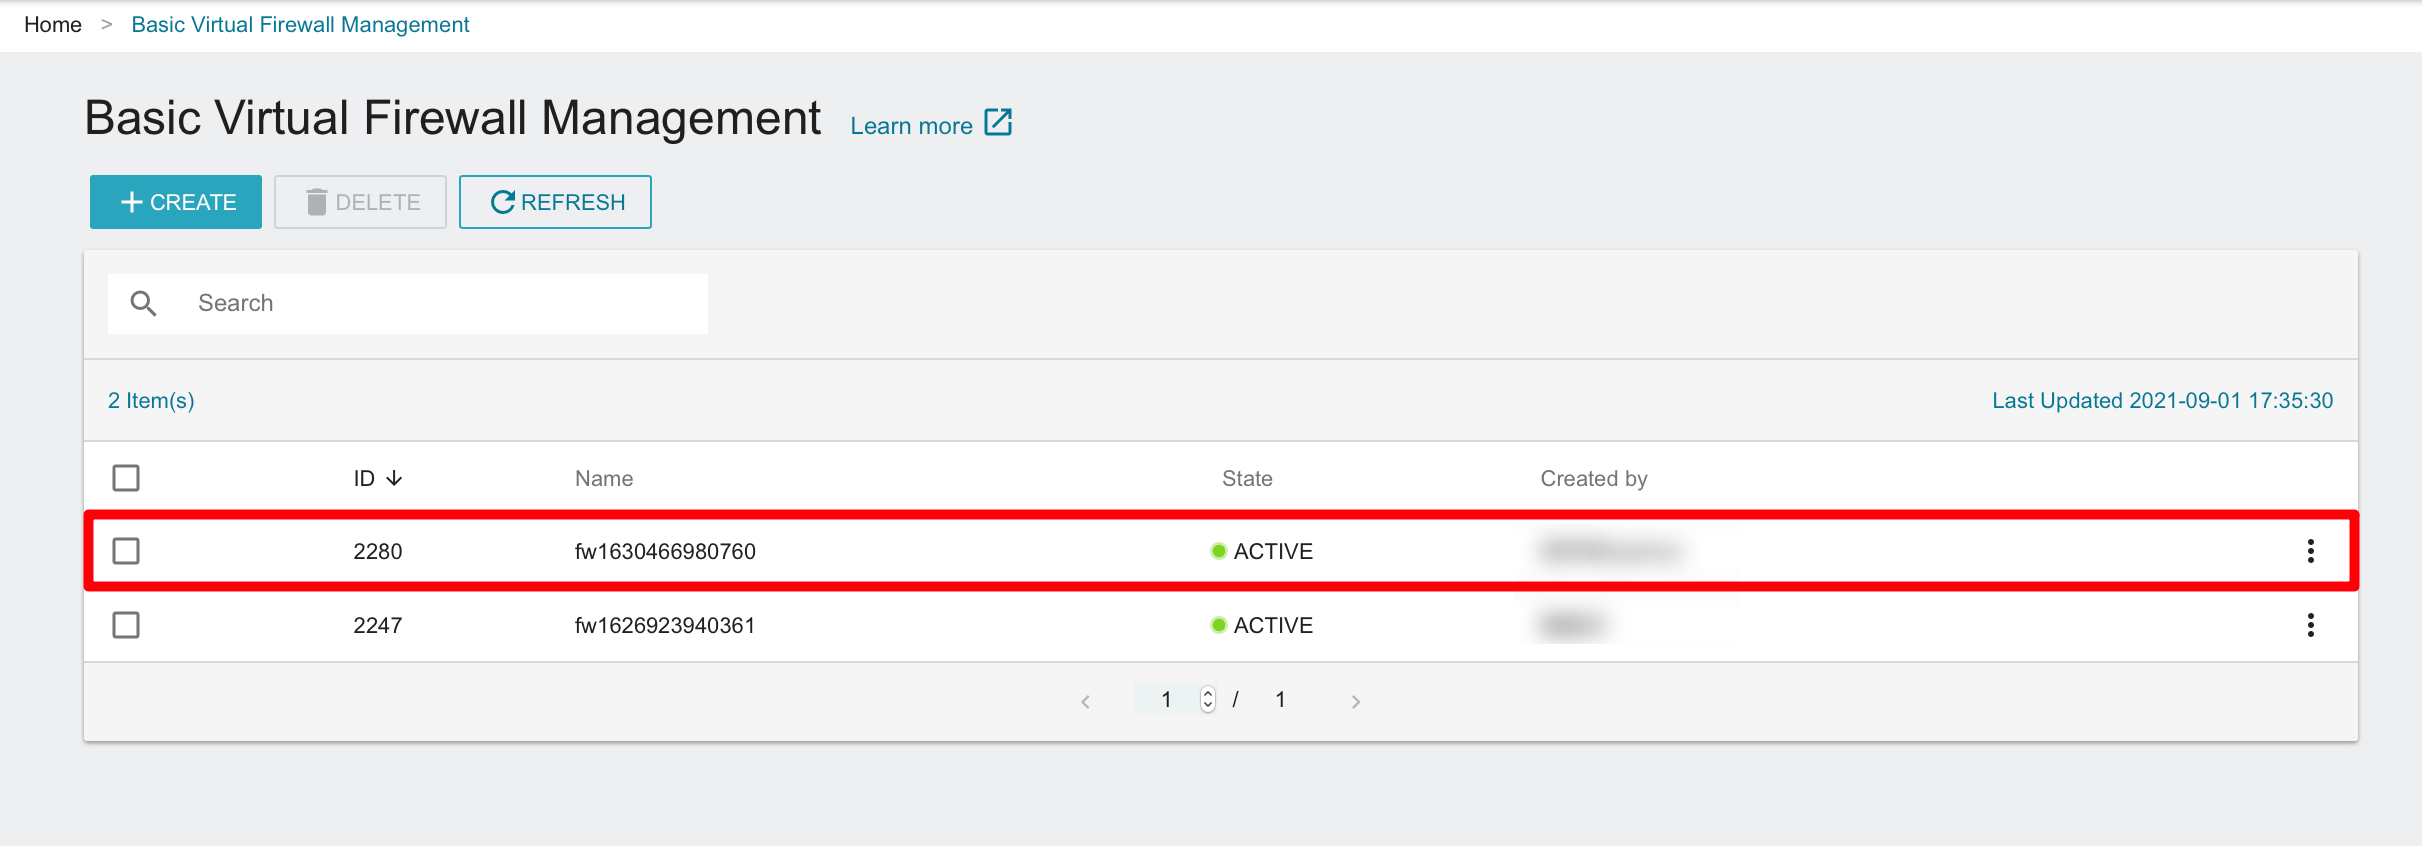
- The created firewall will be displayed at the top of the Basic Virtual Firewall Management list. Click the list to view firewall details or edit rules.
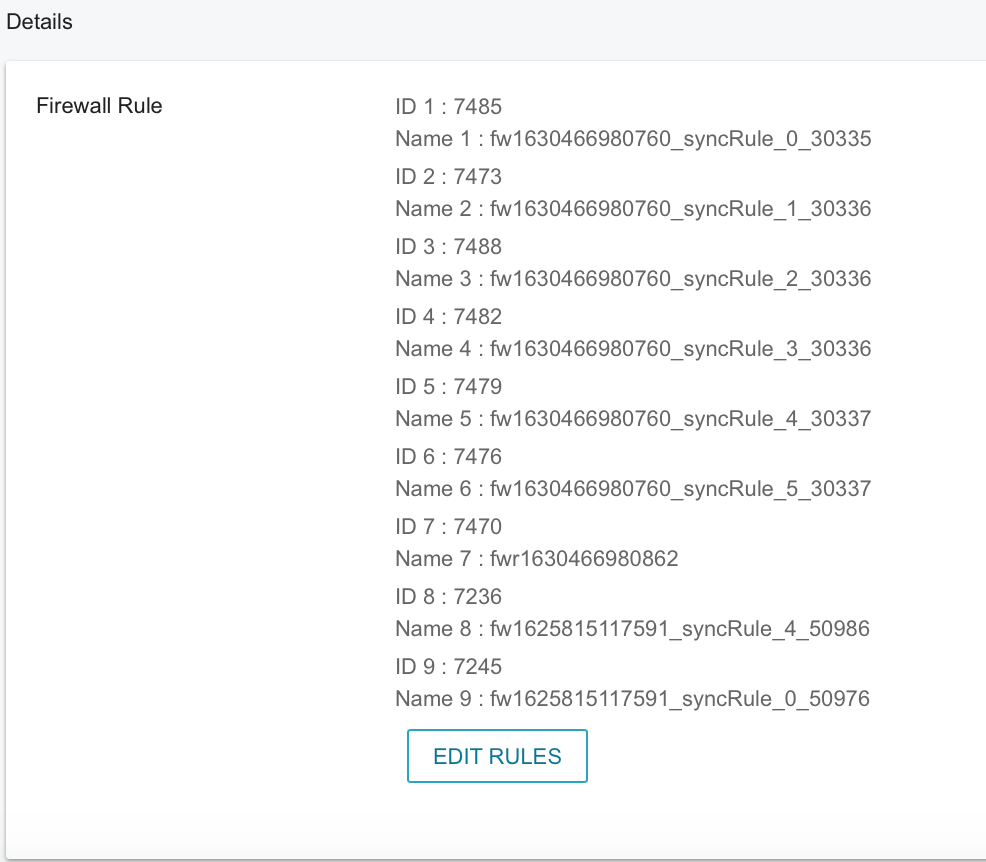
- The rule name with SyncRule is the rule that synchronized from the Security Groups.
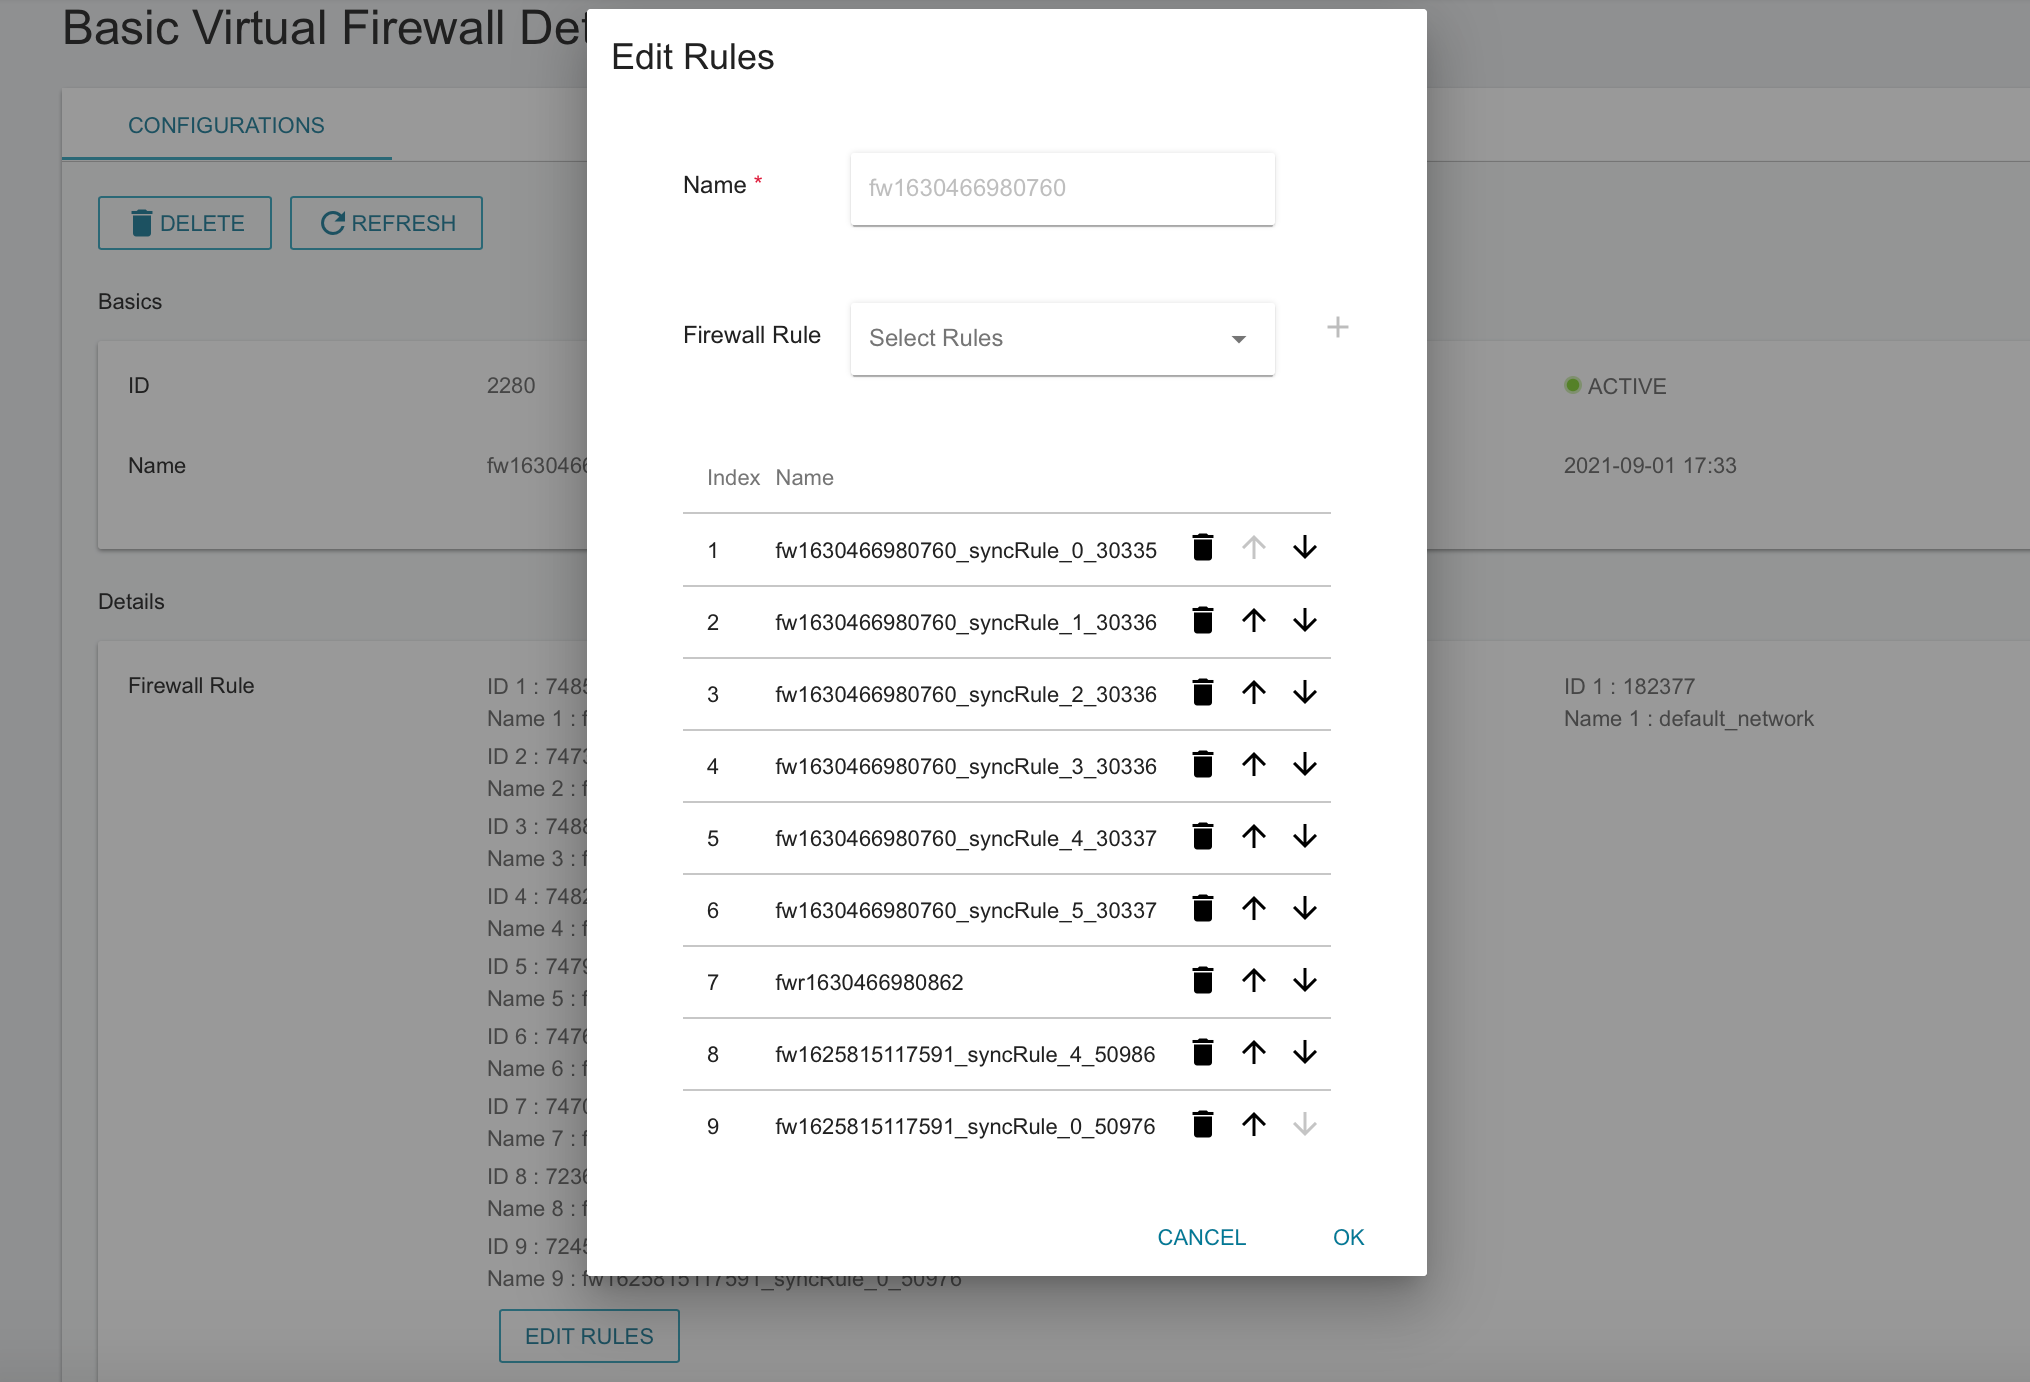
Edit firewall rules
Each project has a limit of 85 firewall rules.
- In Basic Virtual Firewall Details page, click EDIT RULES to change the priority of the rules or delete the rules.
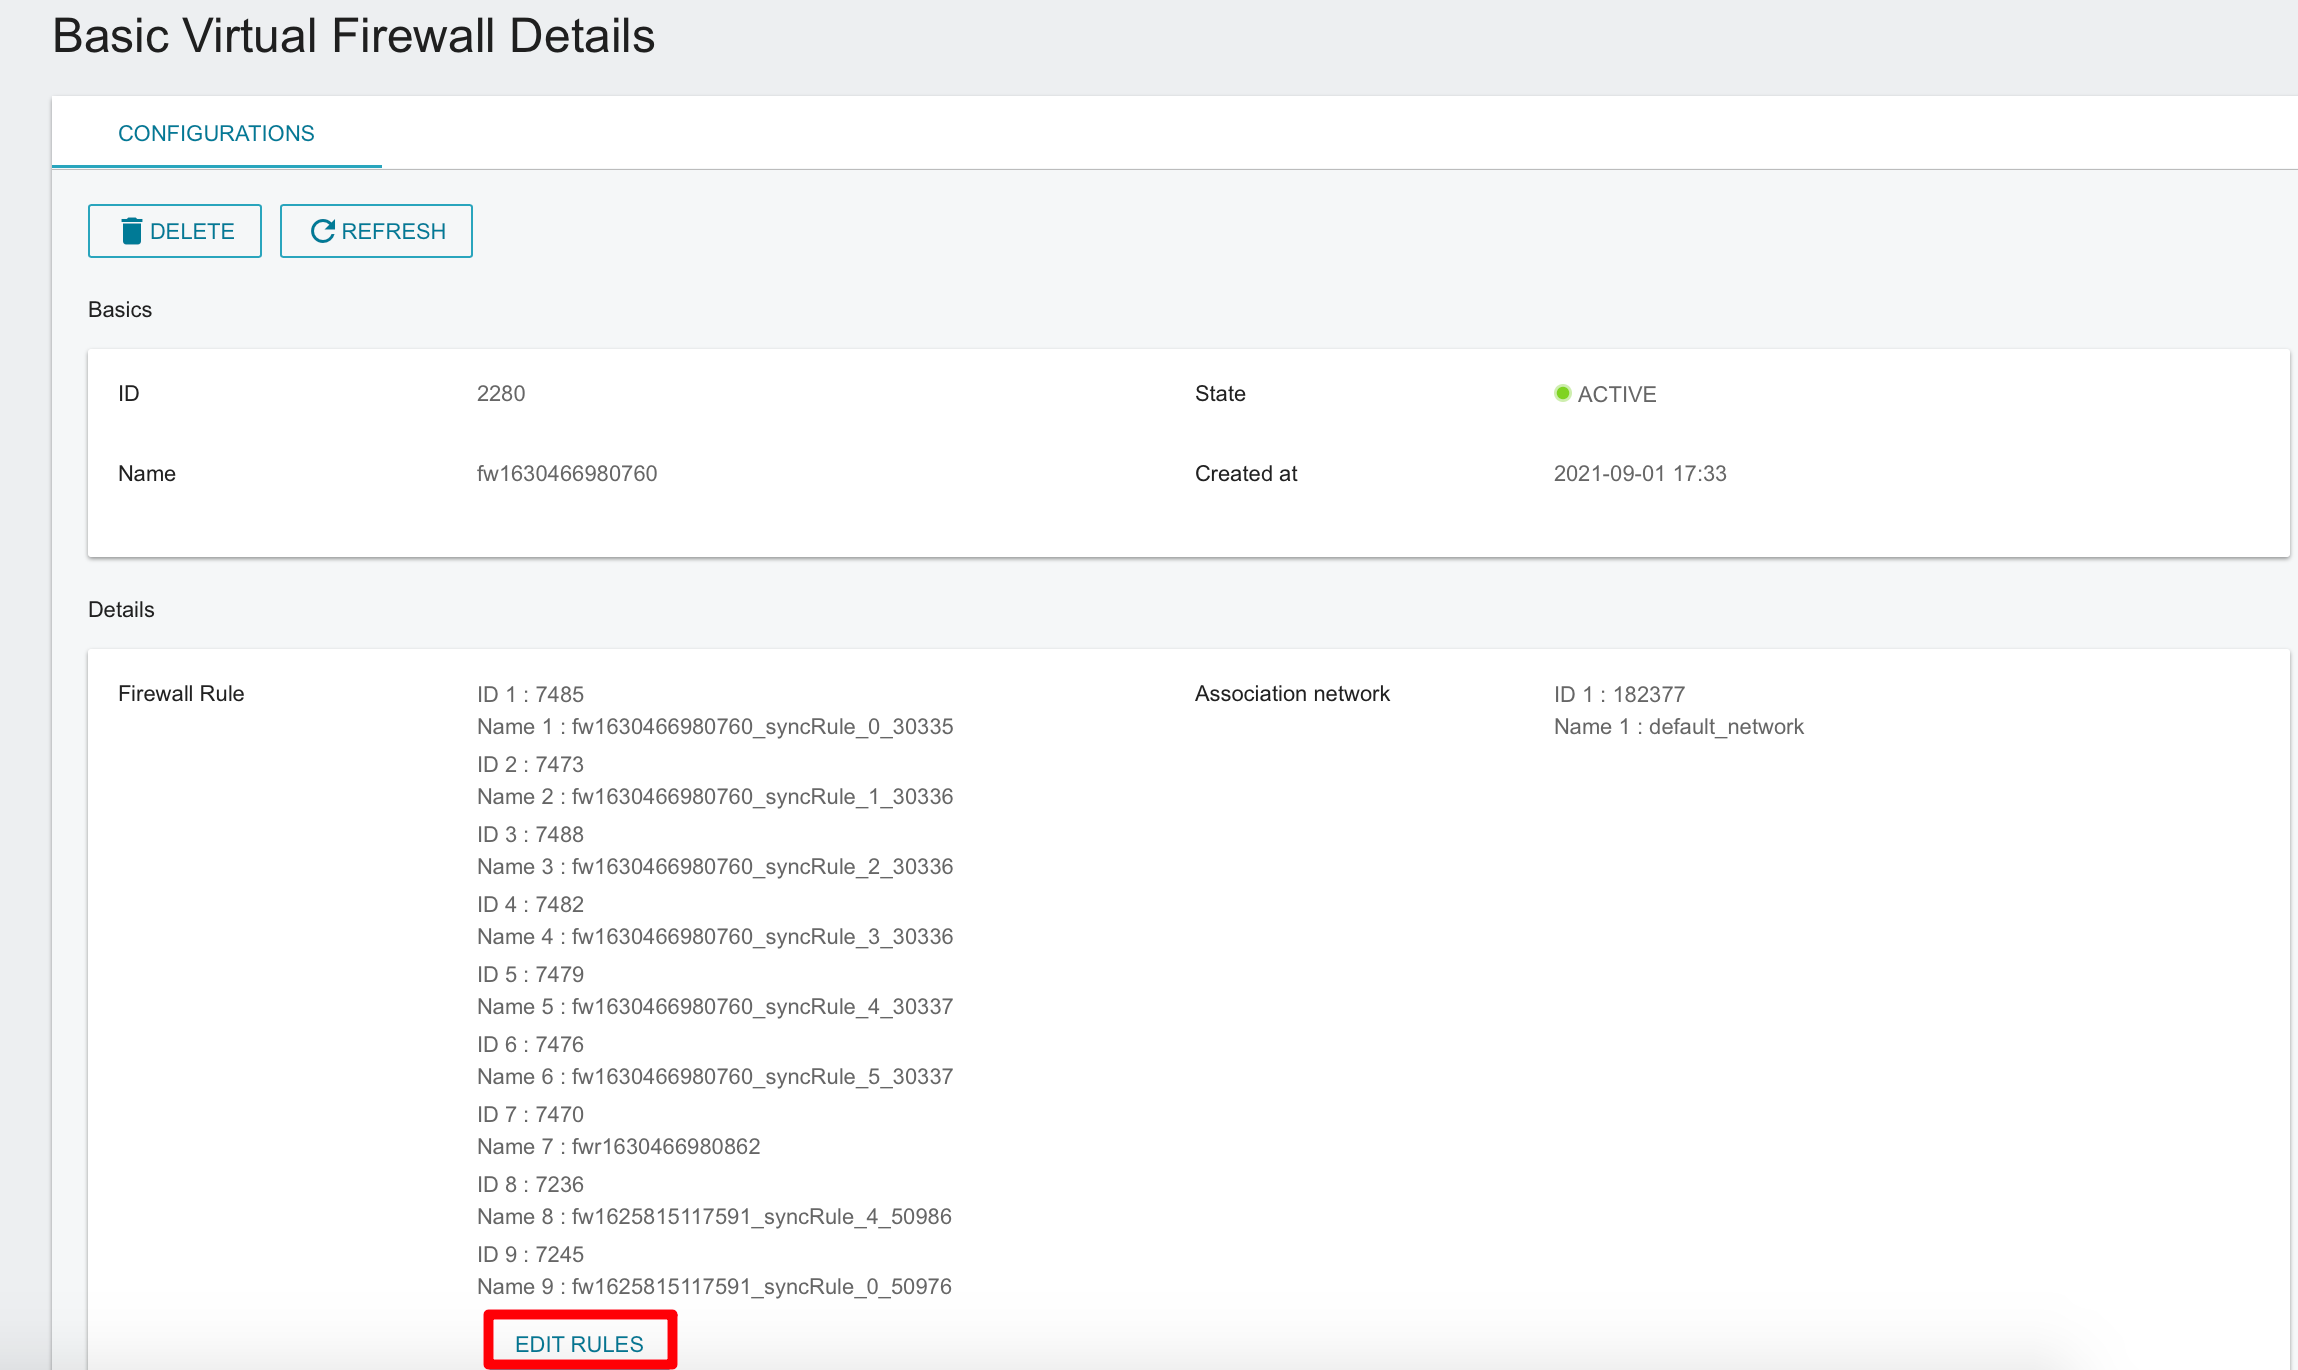
- In Edit Rules window, you can adjust the order of rules, add or delete rules. Click OK when you are ready.
- After finishing editing, the firewall will enter the
PENDING_UPDATEstate. The new settings take effect when it enters theACITVEstate after a few minutes.