# Part 1: Build your website architecture
The load balancer will be in the front line of the web service architecture. After the user initiates a connection request, the load balancer will direct the user’s traffic to the rear of the web server and determine which server provides the service.
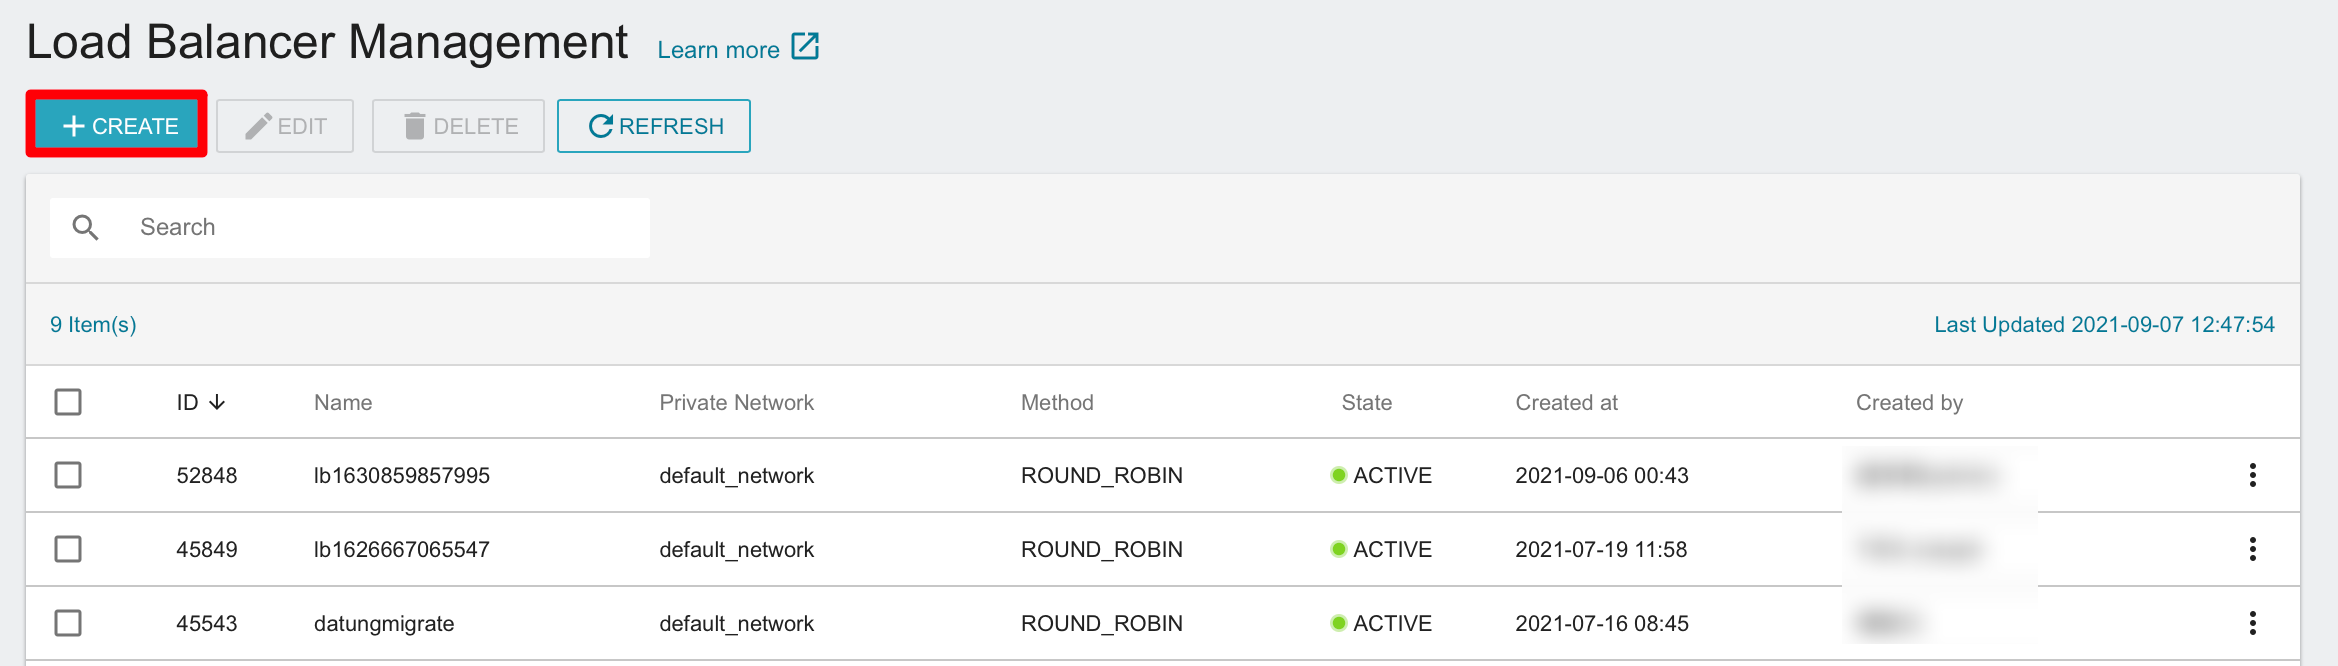
Step 1. Create a front-end load balancer
- Click Load Balancing Service (LBS) from the service list to go to the Load Balancer Management page, and click +CREATE.
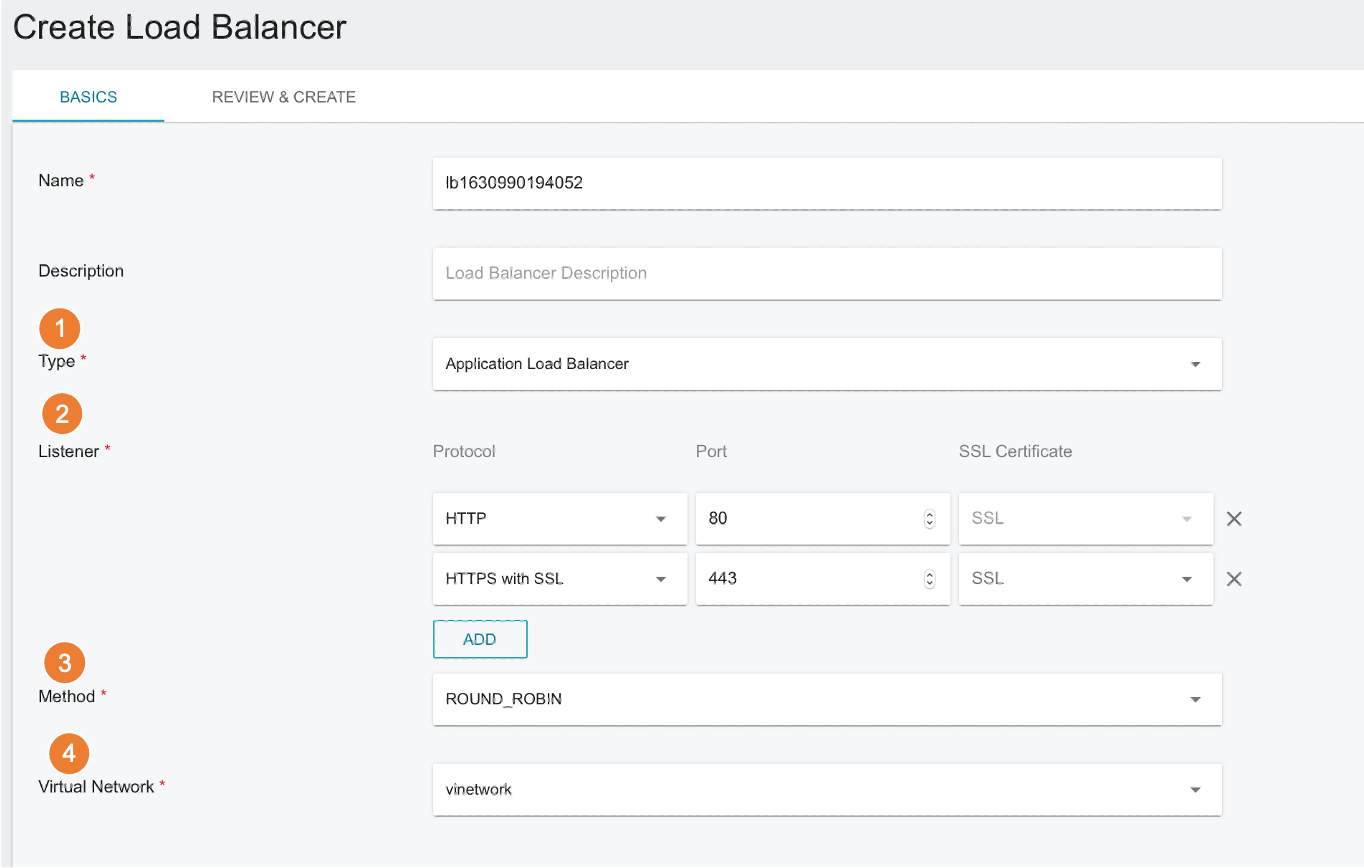
- Fill in the configuration information of the load balancer, and then click NEXT: REVIEW & CREATE>.
- Type: Select Application Load Balancer
- Listener:
a. Select HTTP for protocol, and set port 80 to provide HTTP service.
b. Select HTTPS with SSL for protocol, and set port 443 to provide HTTPS encrypted transmission service. - Method: Select ROUND_ROBIN
- Virtual network: Select the network on which the load balancer working.
Build the load balancer and the VCS instances in the Step 2 at the same virtual network to bring the load balancing into effect.
TWSC provides 3 load balancing methods:
- ROUND_BIN: The load balancer will assign users to different servers in turn. Since each server has the same weight, it will provide services to users in turn.
- LEAST_CONNECTION: The load balancer will detect the server group and assign user to the server with few connections.
- SOURCE_IP: The load balancer allocates users to different servers according to the source address (user's IP), and the system will redistribute users when the next request is initiated.
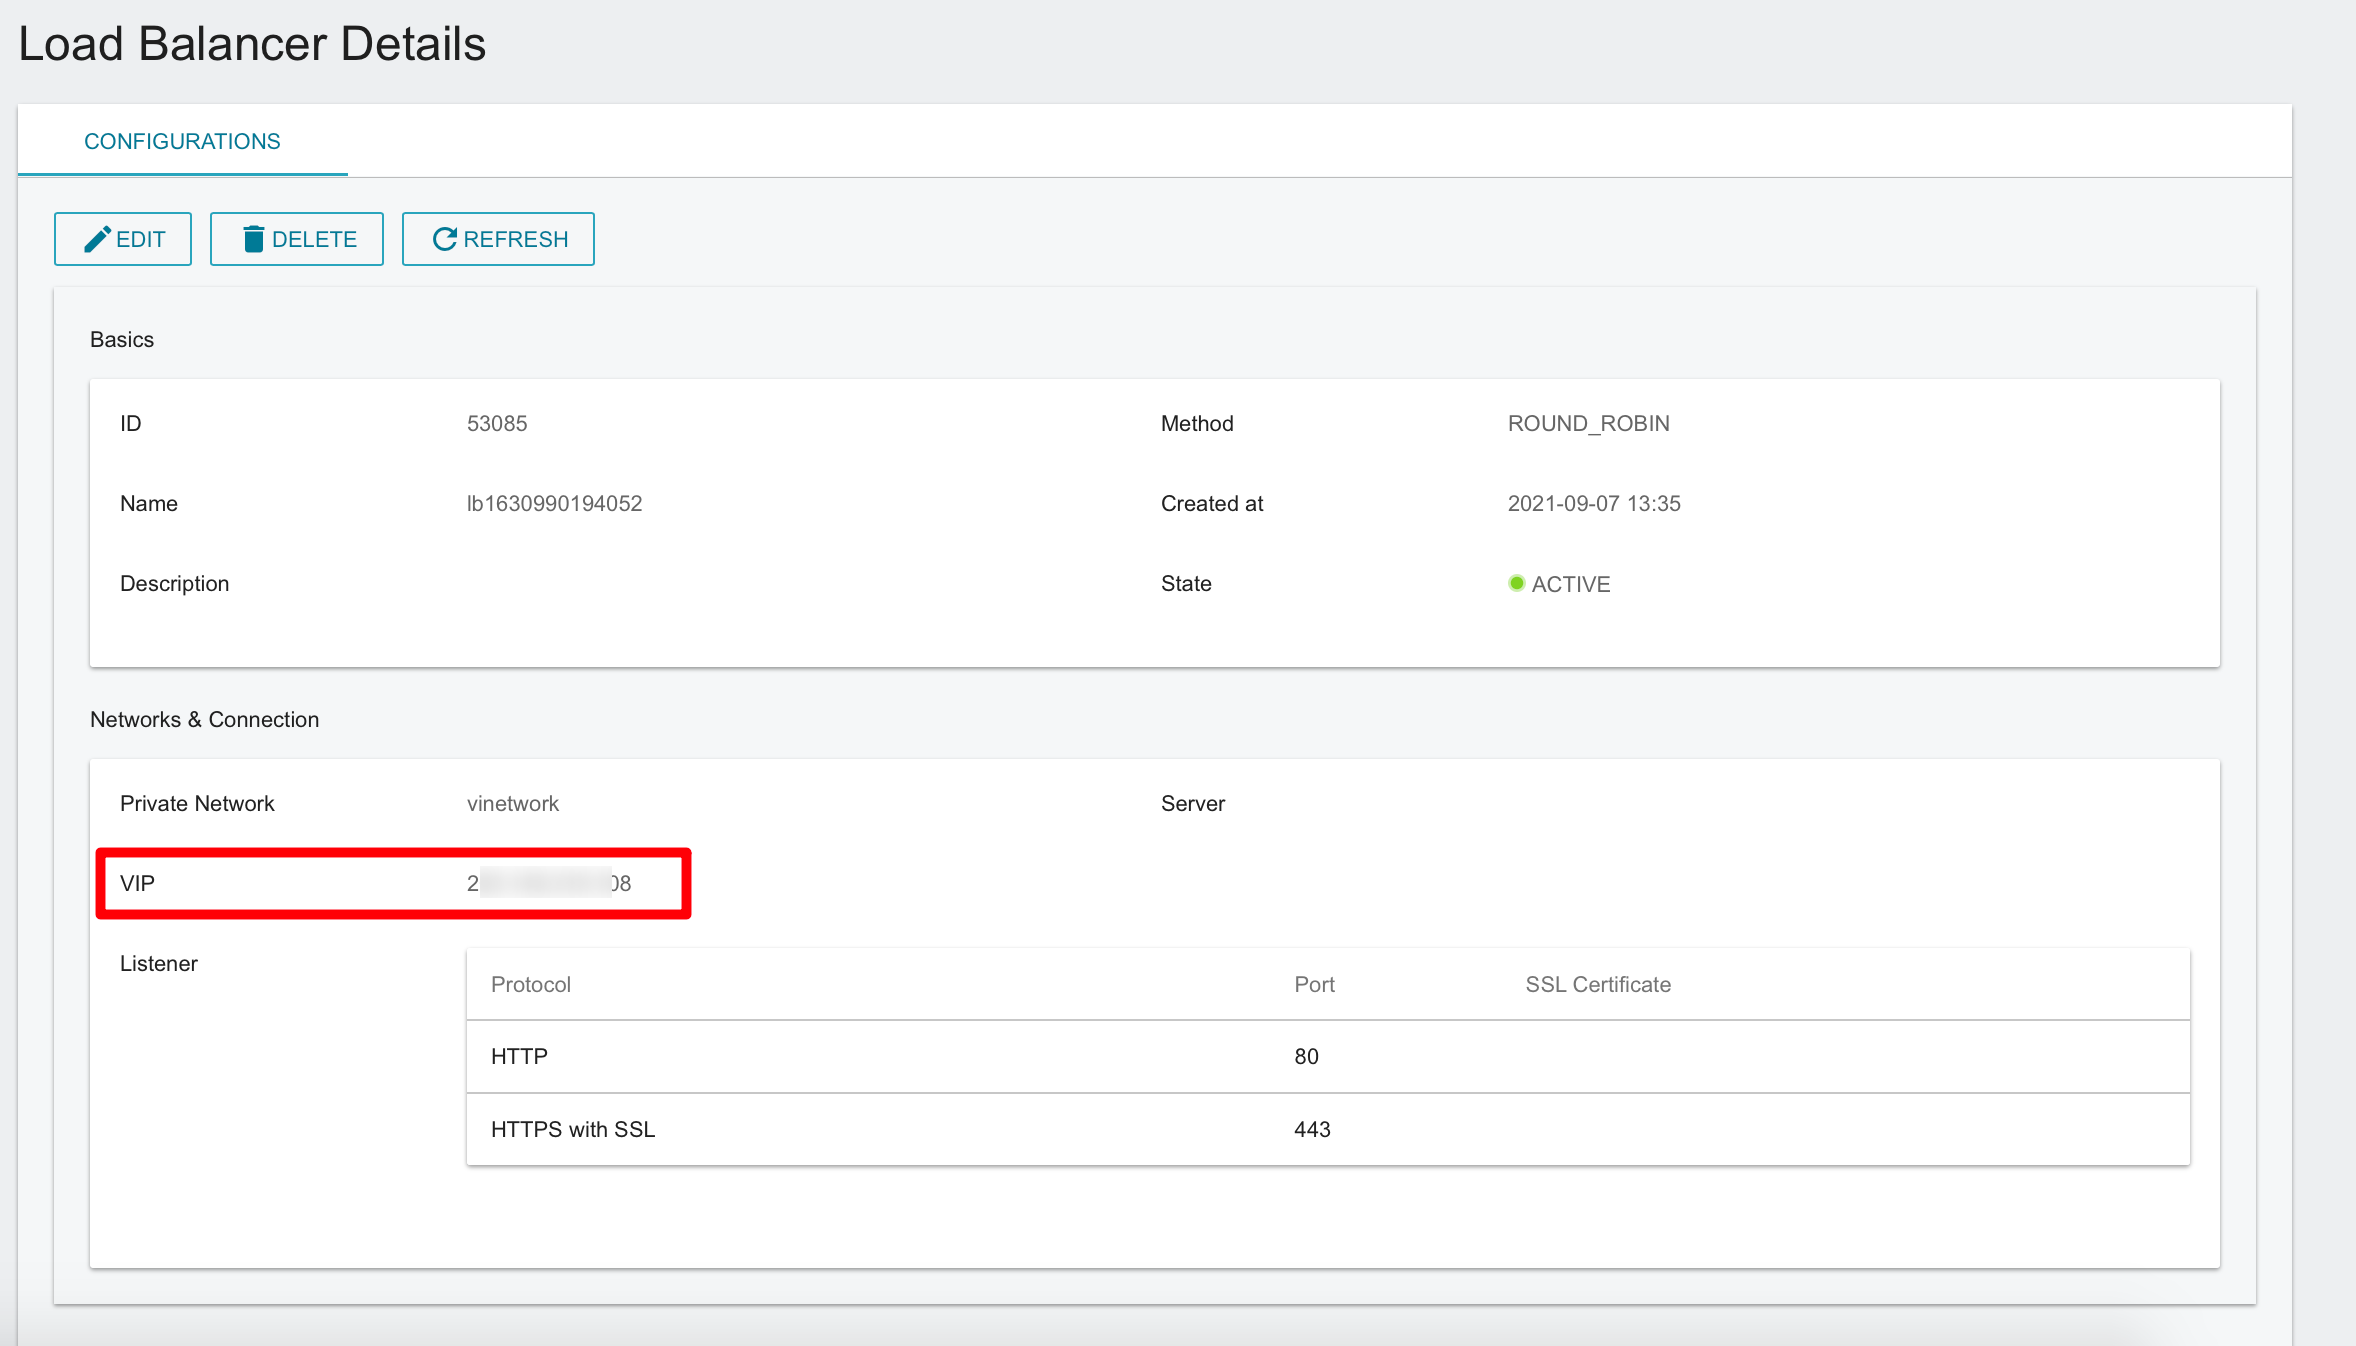
- After the creation, return to the load balancer list, and click on the load balancer.

- Enter Load Balancer Details page, wait until the balancer enters in
ACTIVEstate to continue editing it. - VIP (Virtual IP): You can apply for DNS to provide external service and use your web service through this IP.
Step 2. Create a back-end web server and set up NGINX web service
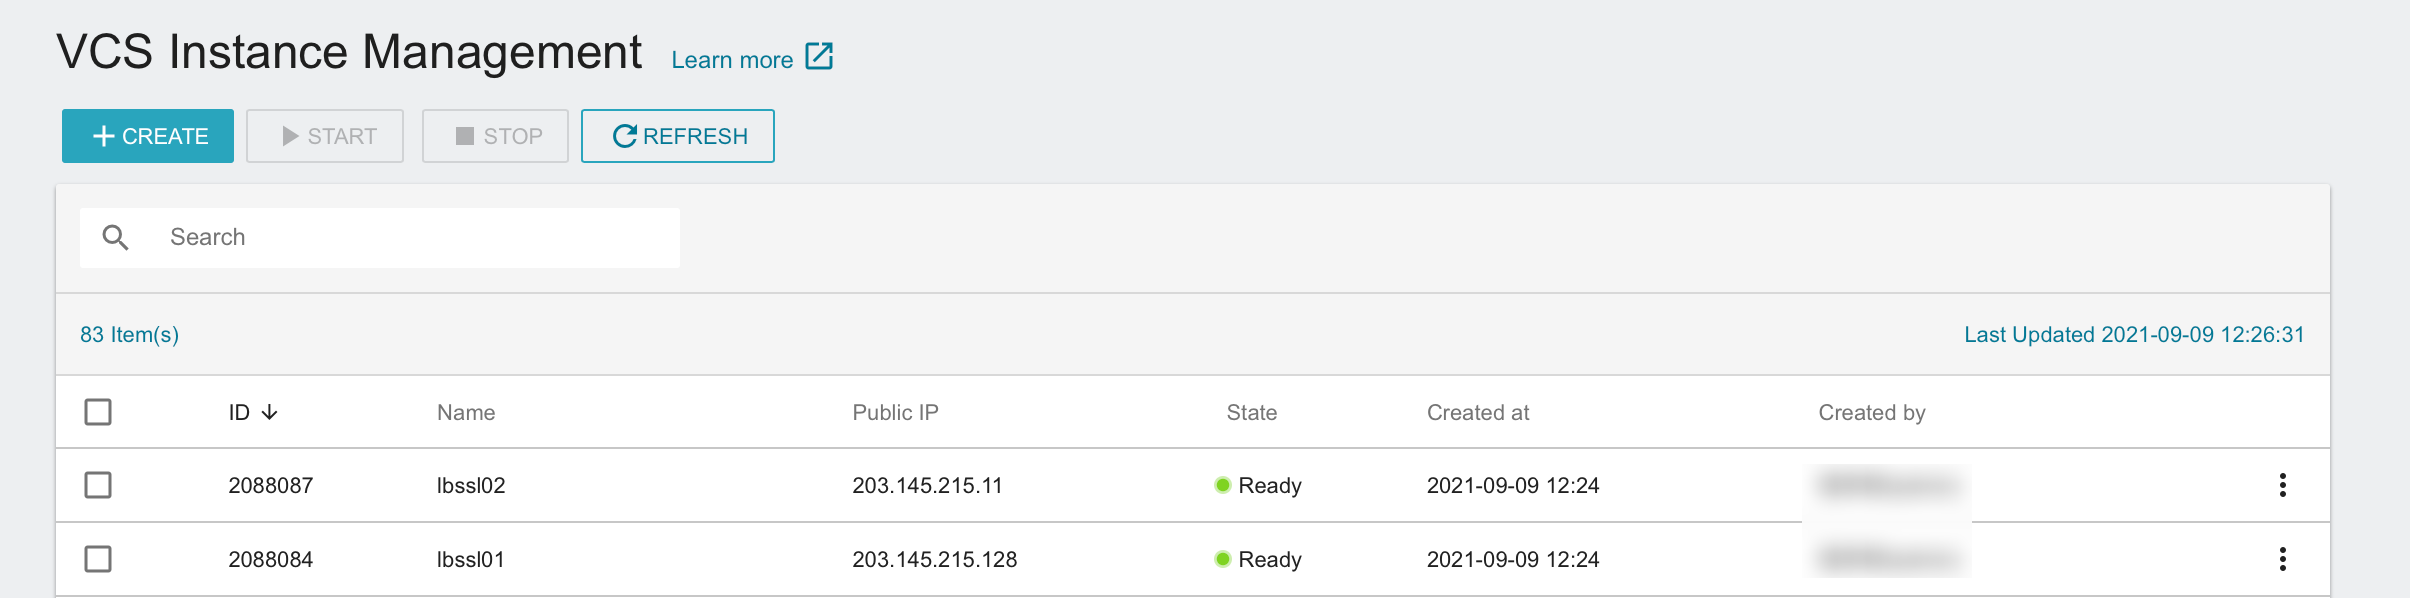
- Enter VCS Instance Management page and create two VCS instances named lbssl01 and lbssl02.
- For creating VCS instances, please refer to Virtual Compute Service (VCS).
- The example selects Ubuntu as the image, same network for virtual network and load balancer, and open the public IP for the follow-up web maintenance. Other configurations are created with default settings.
You can also use the image file to quickly create a lbssl02 web server after the lbssl01 individual has finished setting up the web page to save the cost of repeated installation of the application.
You can also use the image to quickly create instance lbssl02 after creating instance lbssl01 to save the cost of repeated installation.
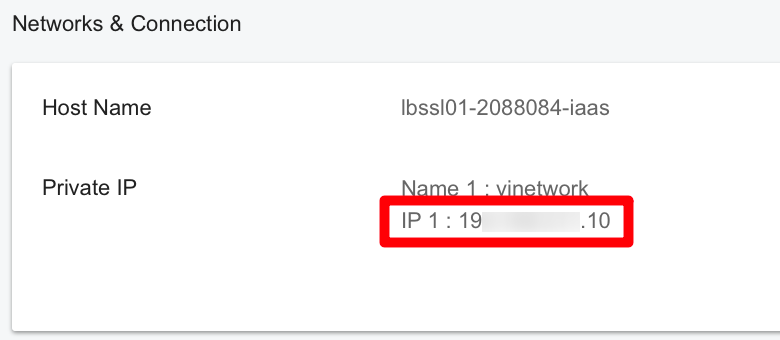
We will use the private IP of the VCS instance in the following steps. Please enter VCS Instance Details page and record the private IP for subsequent use.
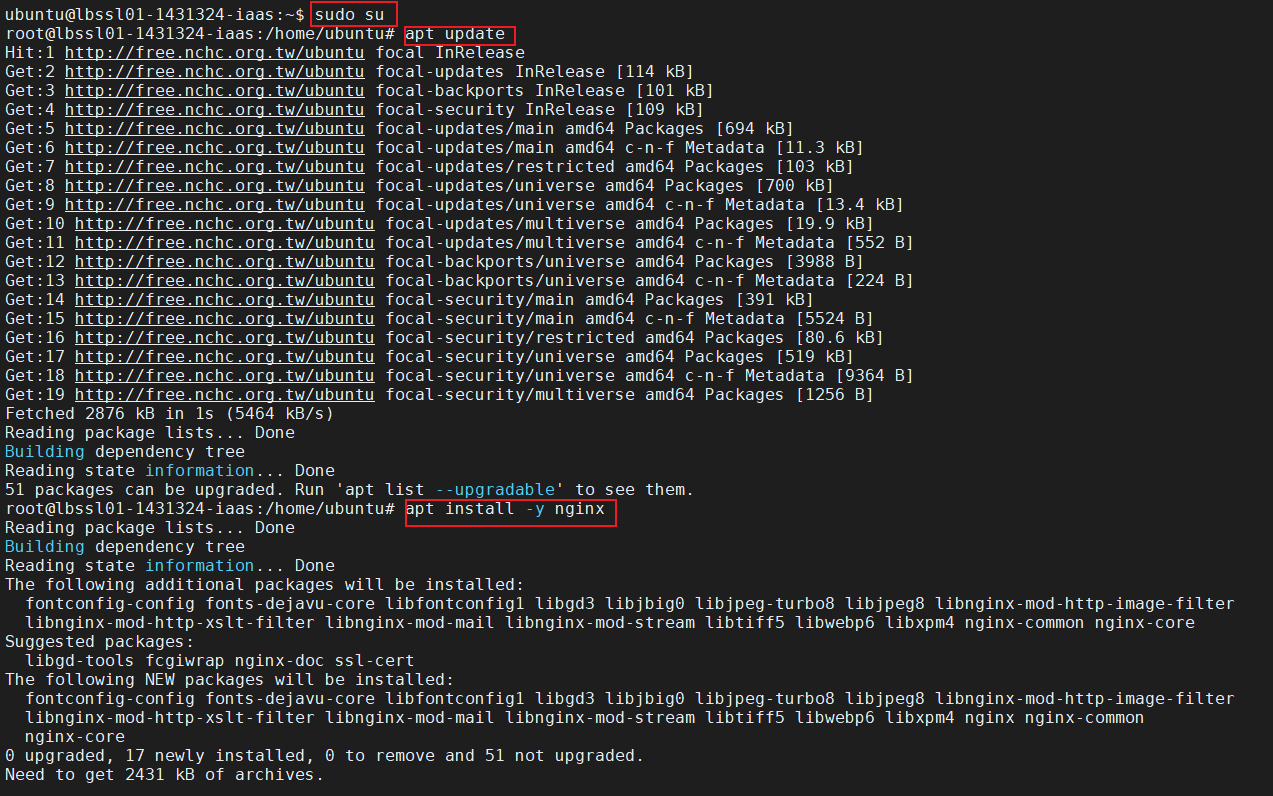
- Use the public IP to connect to lbssl01 and lbssl02 instances, and use the following 3 commands to set up the NGINX web service in the instances:
- For connecting to the VCS instance, please refer to Connect to VCS instance).
- We use NGINX to build websites in the example. You can install different tools according to your needs.
sudo su
apt update
apt install -y nginx
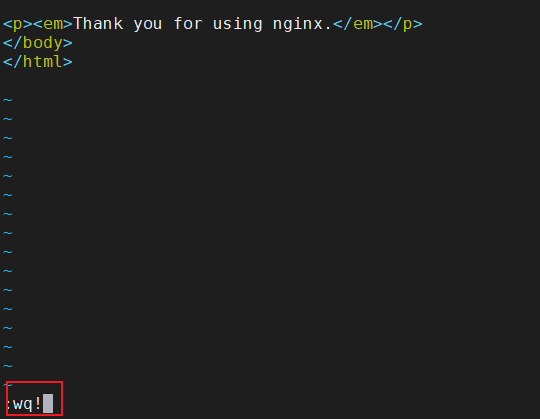
- After installation, you can start to build your web page on lbssl01 instance, or enter the following command example to edit the content of the static web page:
vim /var/www/html/index.nginx-debian.html
- Press i key to enter insert mode, and change the middle string of
\<h1>\</h1>to Hi, this is VCS lbssl01!.
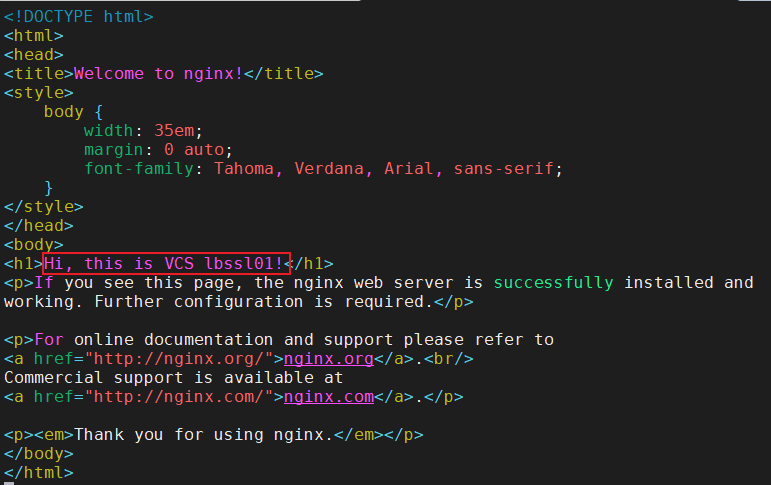
- Press Esc key to exit from insert mode, and insert
:wq!and press Enter key to save the file and exit.
- Enter the command again, restart NGINX.
systemctl restart nginx
- Follow the same steps as above to modify the content of lbssl02. The string displayed on the webpage can be modified to different content: Hi, this is VCS lbssl02! to check the effect of load balancing.
Step 3. Set up security group of the instance: open port 80
By setting up a security group, port 80 is established so that the load balancer can connect to the back web server (VCS instance), distribute user requests, and send responses back to users.
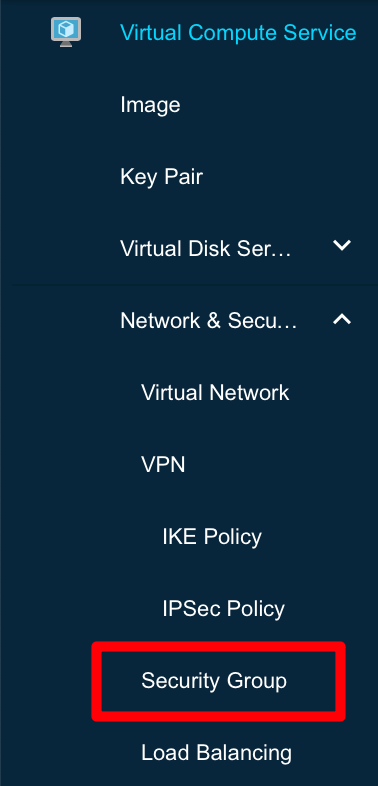
- Click Network and Security> Security Group on the left.
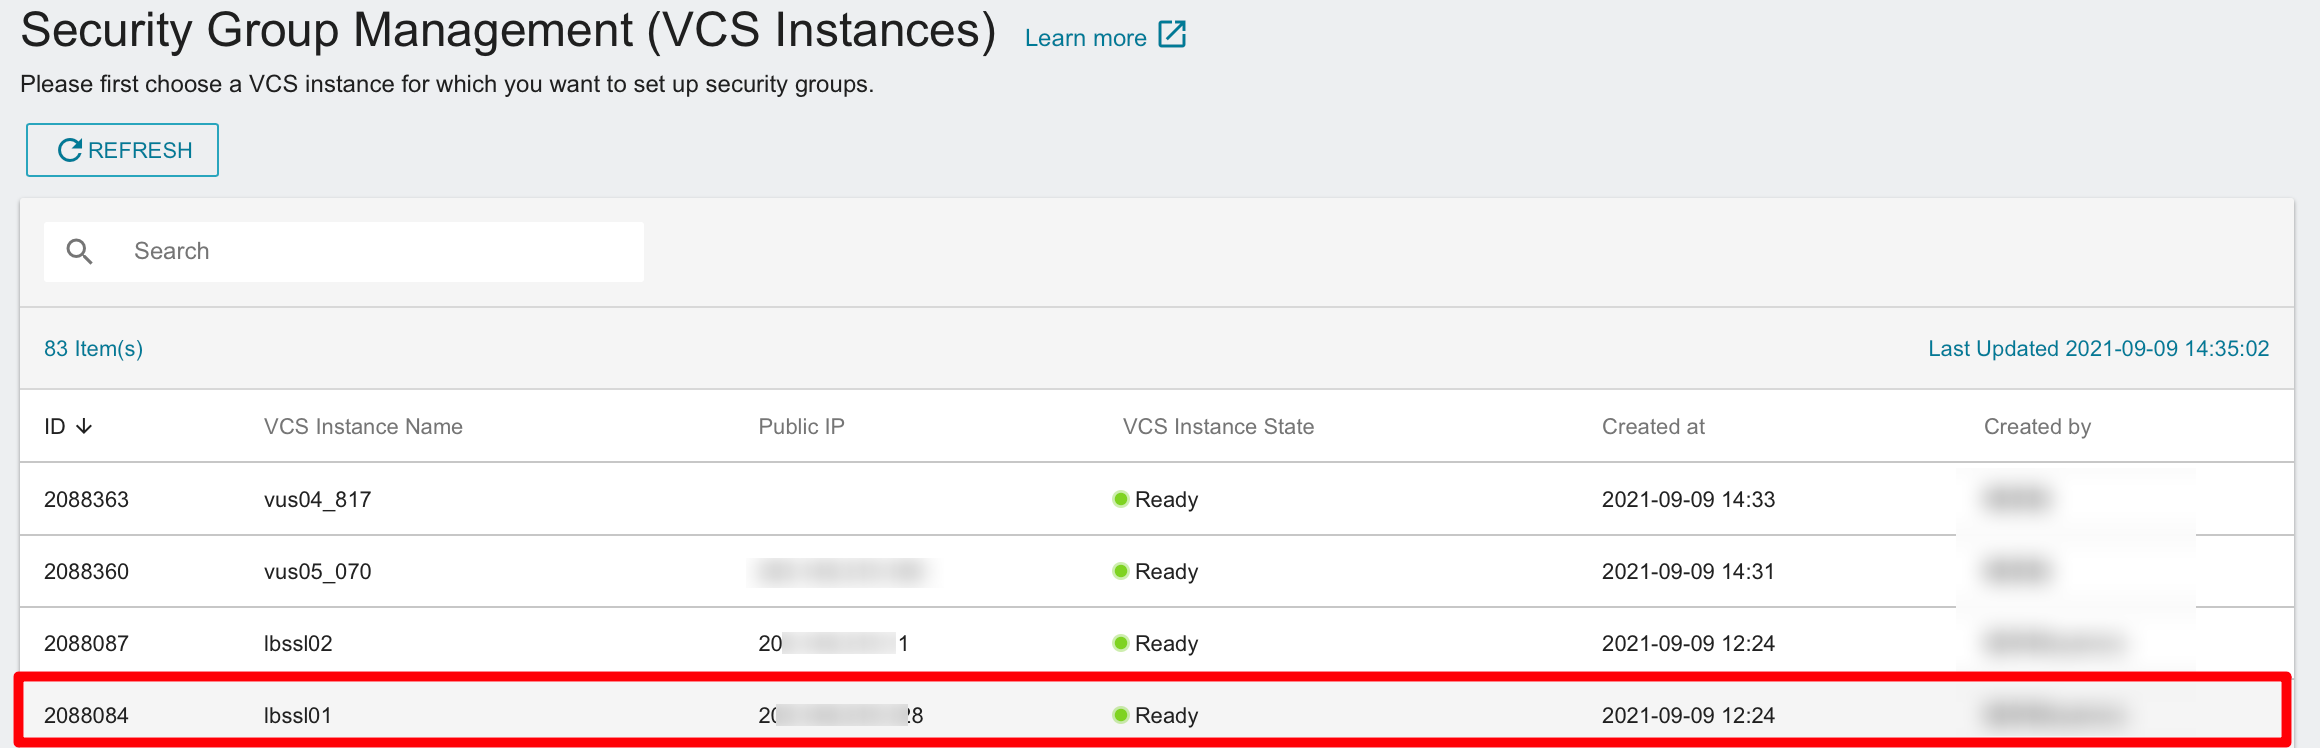
- And click the created lbssl01 instance.
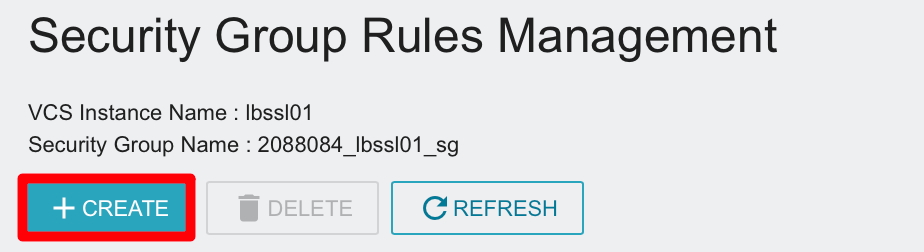
- Then click to enter the security group of the instance, and click +CREATE.
- Configuration information
- Direction: Select Ingress (Users connect from outside and enter the instance to use the service)
- Port Range (Min), Port Range (Max): Set 80 (Open port 80 to provide HTTP service, and the web program will automatically direct the connection to port 443 to provide HTTPS web service)
- Protocol: Select TCP
- CIDR: Fill in the CIDR of the virtual network to ensure the load balancer on the same network segment can access this instance.

- For instance lbssl02, also follow the same steps to add port 80.
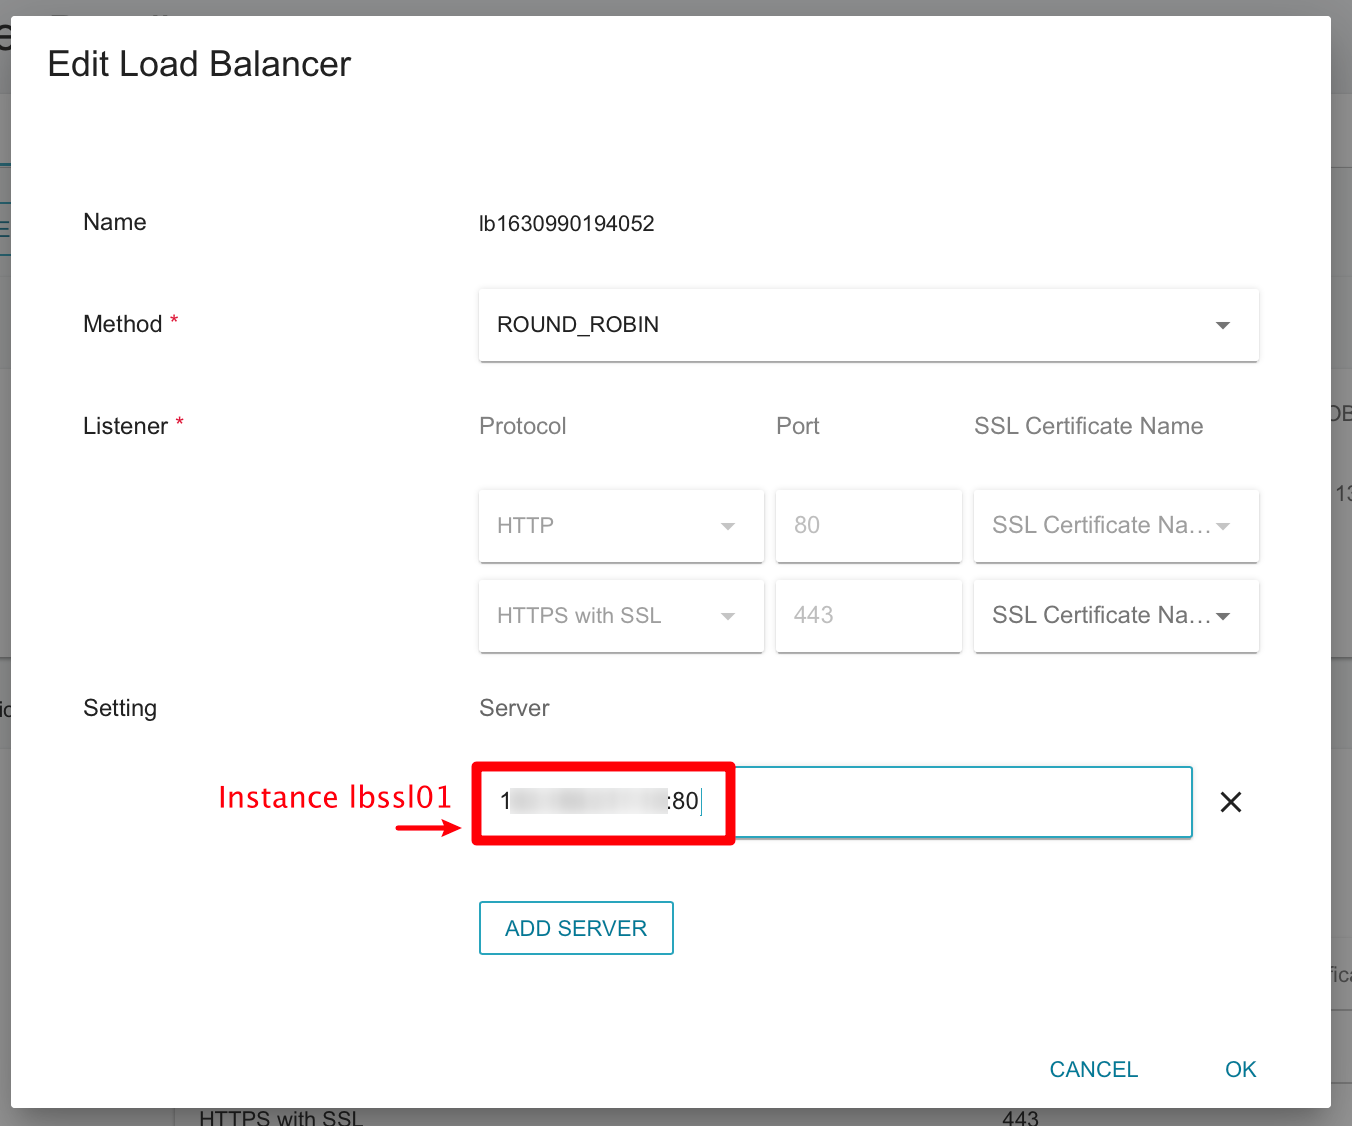
Step 4. Connect the VCS instance to the load balancer
- Enter Load Balancer Details page > Click EDIT
- Add
<private IP>:<port> (80)information of instance lbssl01 to the load balancer > click OK to complete the configuration.cautionPlease do not add lbssl02 to the load balancer until the SSL certificate application is completed.