HowTo: Add a Virtual Network Interface (VNI) to your VCS instance
If your instance is running on Ubuntu 18.04 or newer versions, and was created before December 15, 2023, this feature may not be fully supported. If you encounter issues such as VNI not being automatically enabled, connection failures, or other problems, please manually configure settings within the Guest OS. If the issue persists, please contact TWSC technical support: isupport@twcc.ai.
This tutorial shows you how to add Virtual Network Interfaces (VNI) while creating your VCS instnace or after your instance is created. Dependent VNI and Independent VNI each has different characteristics and limitations. Please see the following for more detailed explanation.
Dependent VNI
- Created when the instance is created, and is attached to that specific instance.
- Its lifecycle is dependent on the instance. It lives or dies with the instance.
- Each instance has only one Dependent VNI.
- It cannot be detached from the instance.
- It cannot be assigned a Private IP.
Independent VNI
- Created independently, and does not need to be attached to any specific instance.
- Has an independent lifecycle. Users can create, view, attach/detach, and delete them freely.
- Each instance can be attached up to 3 Independent VNIs.
- Unattached Independent VNIs can be attached to any available instance at any time, and can also be detached as needed.
- Can be assigned a Private IP.
- Does not disappear when an instance is deleted. When an instance is deleted, the Independent VNIs attached to that instance will be preserved and changed to the
DOWNstate.
If you want to add an Independent VNI to your instance, please first create a VNI.
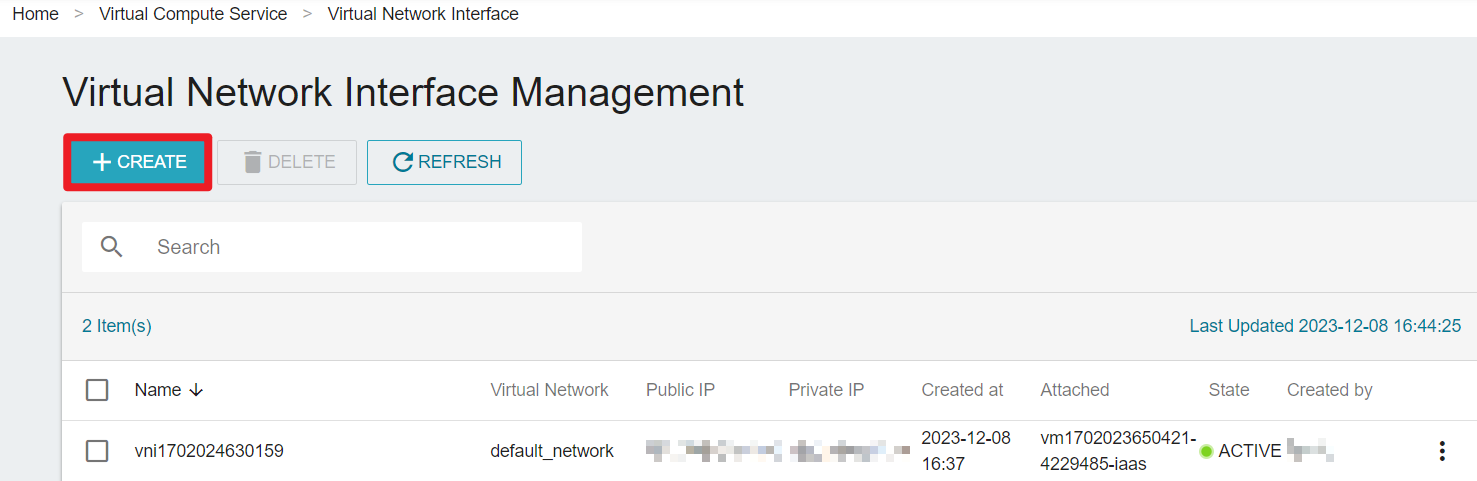
Create a VNI
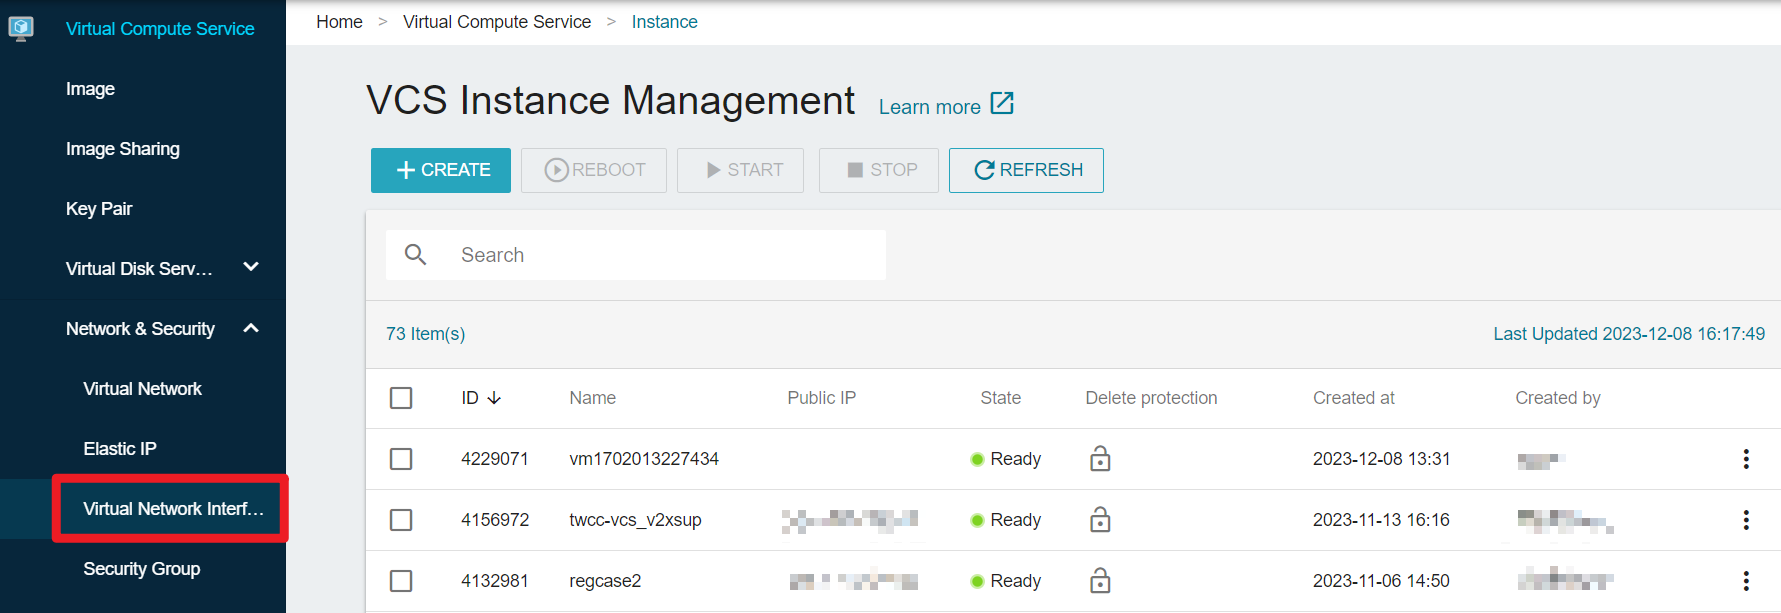
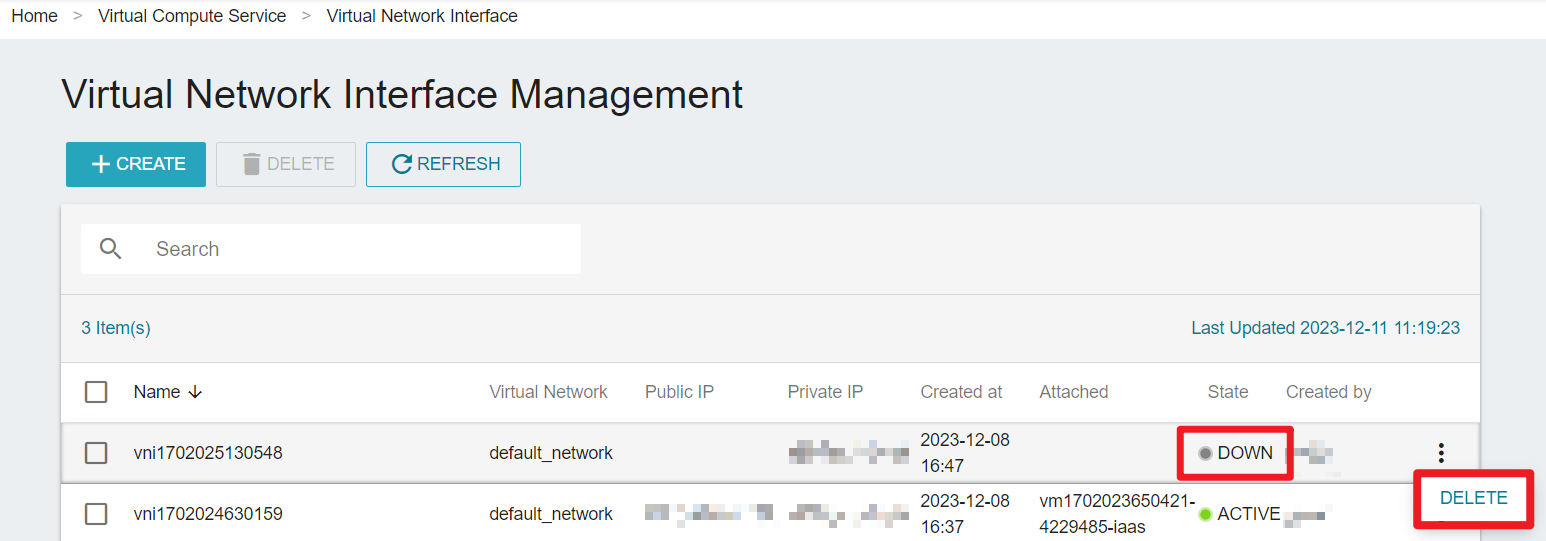
- Click Virtual Network Interface on the left side bar to enter the Virtual Network Interface Management page.
- Click +CREATE.
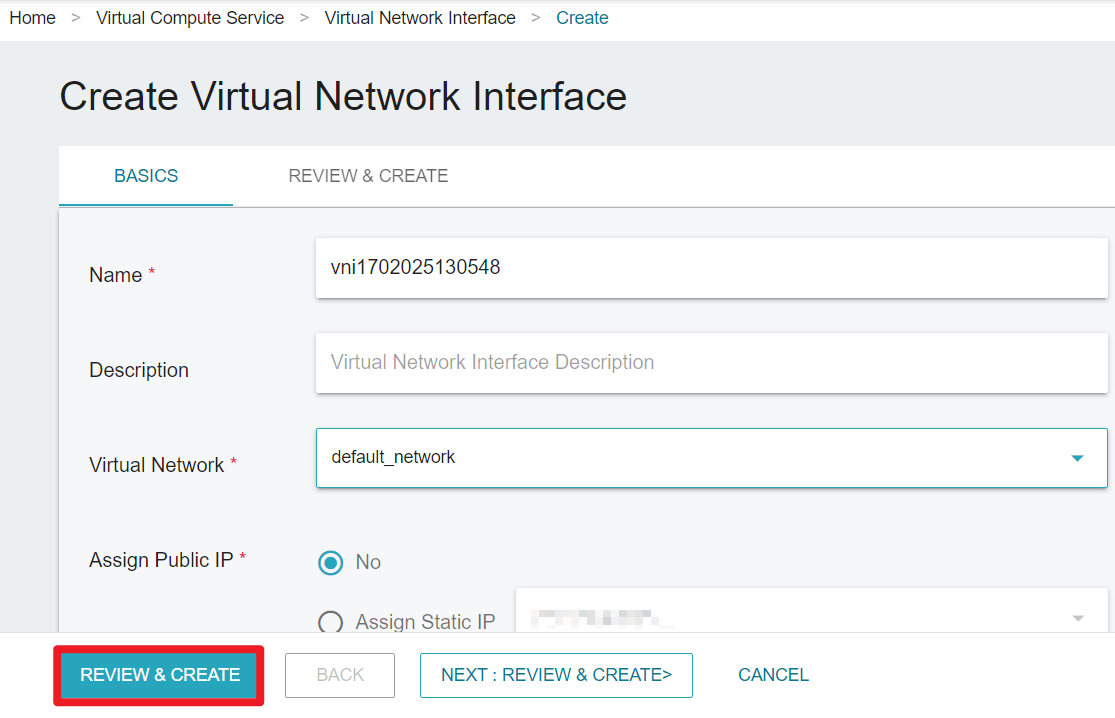
- Under the BASICS tab, select the desired Virtual Network, Public IP and Security Group. Click REVIEW & CREATE.
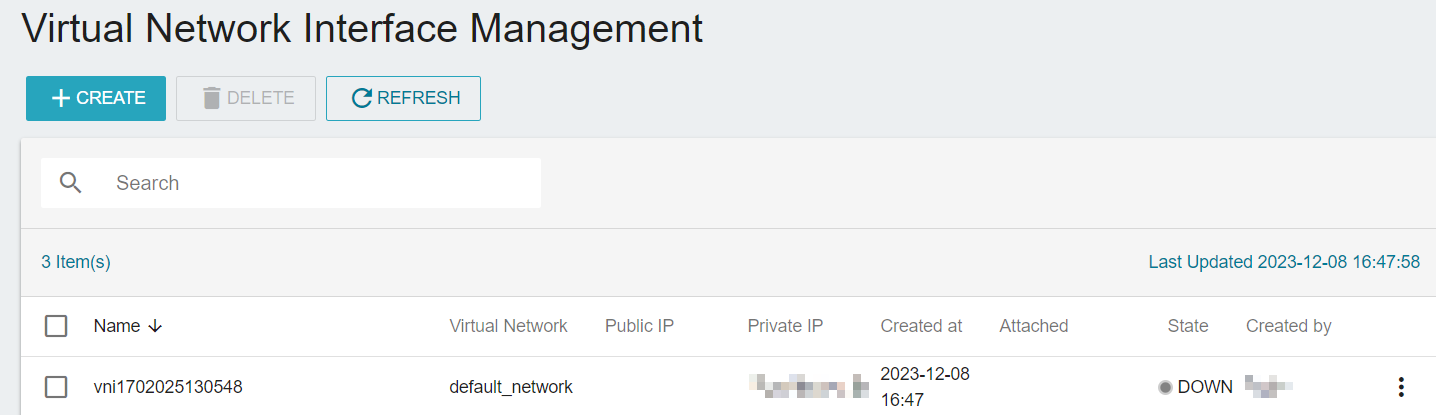
- When the VNI is created, the state will display
DOWN, meaning that this VNI has not been attached to any VCS instance. Please follow the steps below and add the VNI to your instance.
Add VNIs while creating an instance
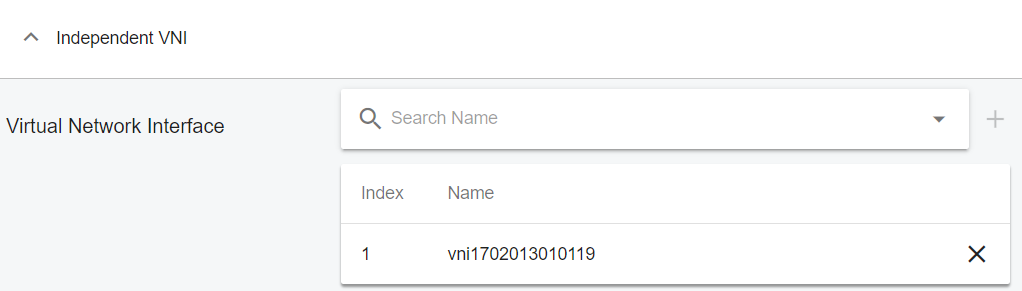
- When creating an instance, go to the VIRTUAL NETWORK INTERFACE tab and select Dependent / Independent VNI.
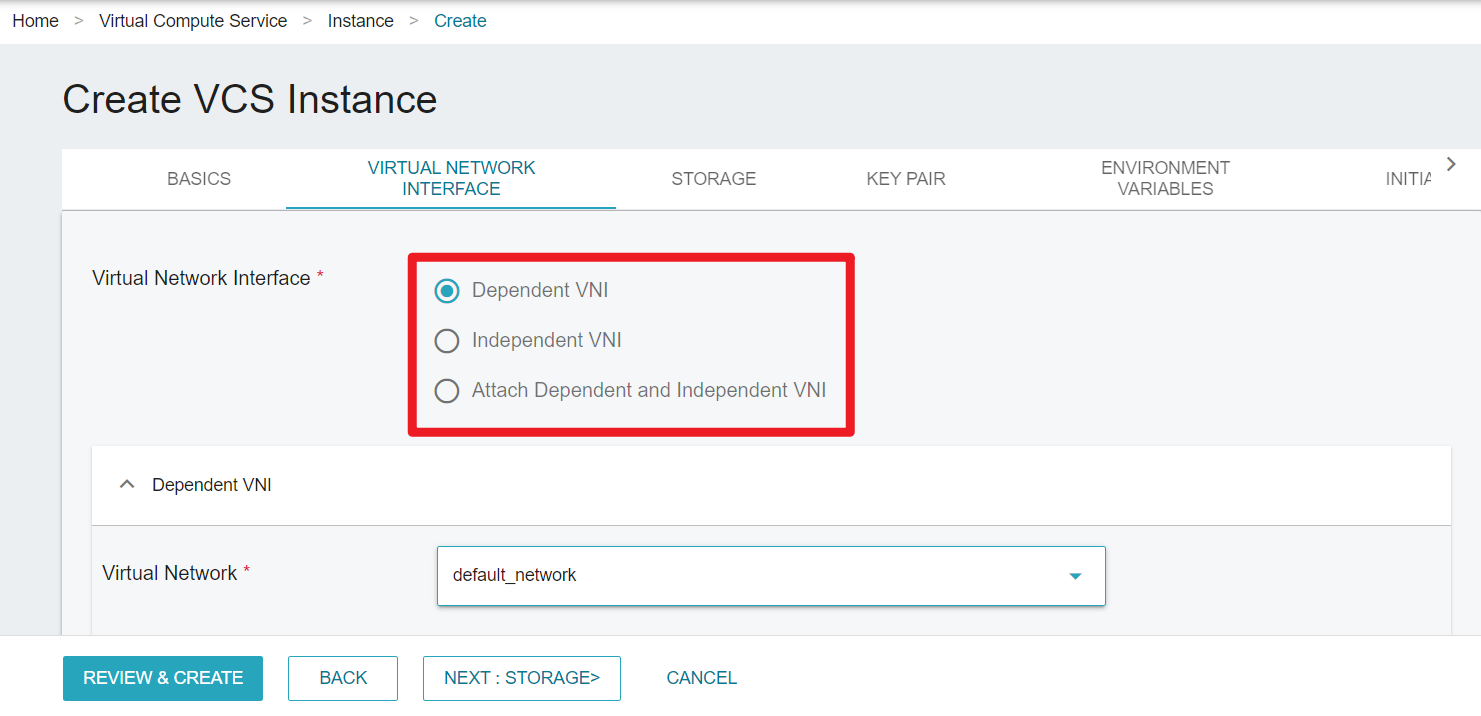
- For the Dependent VNI, select the desired Virtual Network, Public IP and Security Group.
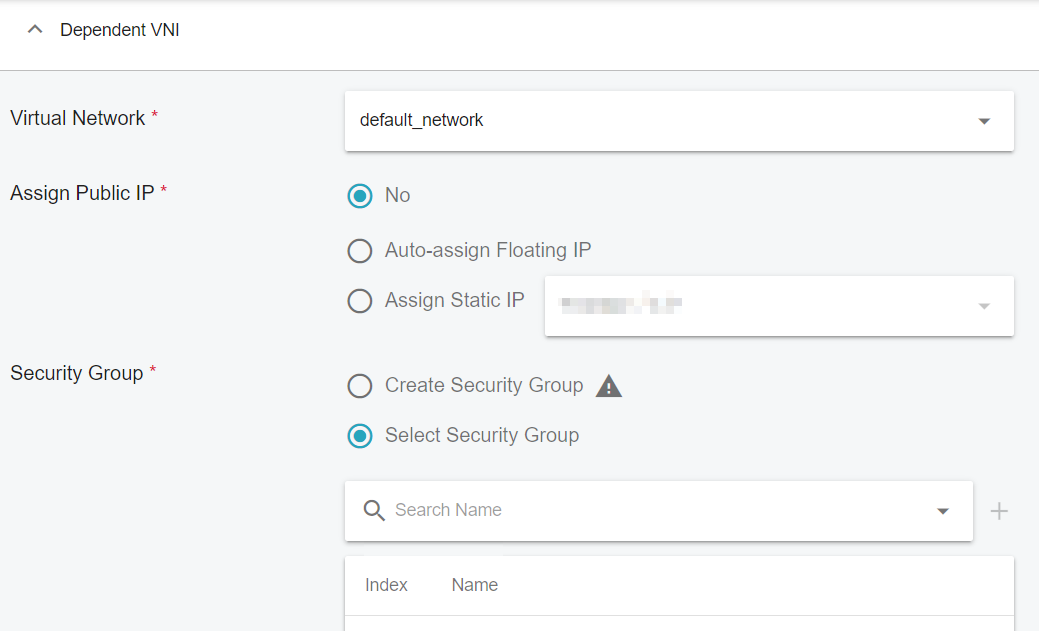
Once a Dependent VNI is created, it cannot be detached or deleted from the instance. It lives or dies according to its instance's lifecycle.
- For the Independent VNI, select the VNI that has already been created.
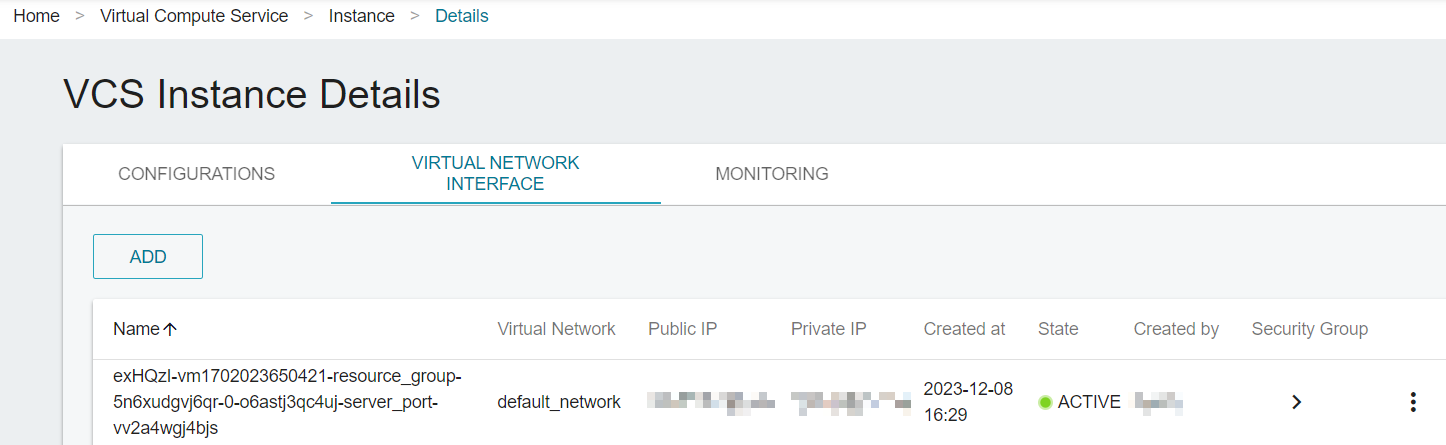
- When the instance is created, click on it to enter the details page. You can view the VNI state under the VIRTUAL NETWORK INTERFACE tab. You can also ADD, DETACH or EDIT a VNI here.
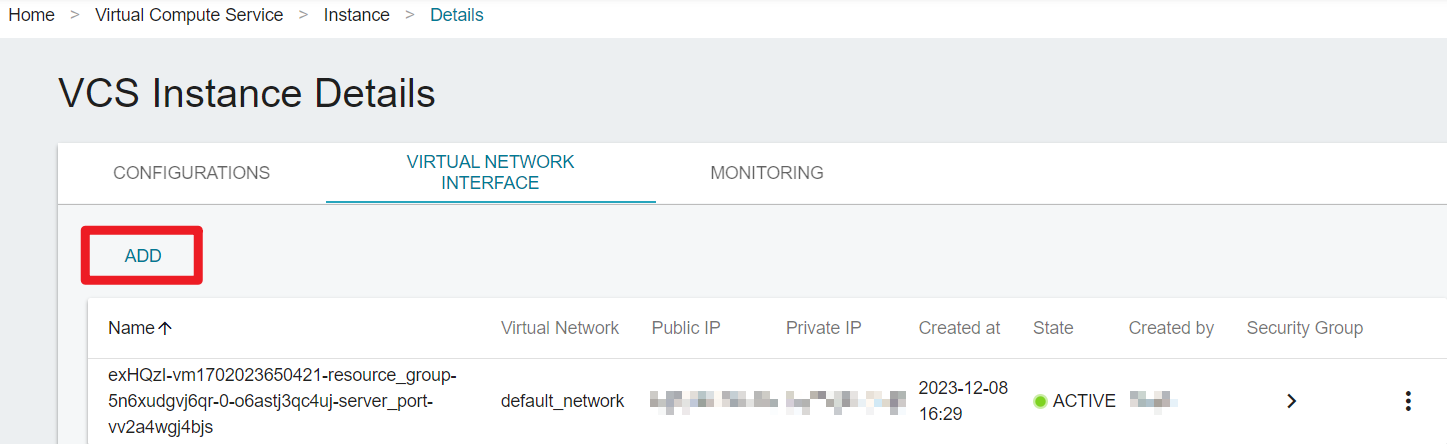
Add VNIs after an instance is created
- Click on the instance and enter the details page. Go to the VIRTUAL NETWORK INTERFACE tab, and click ADD.
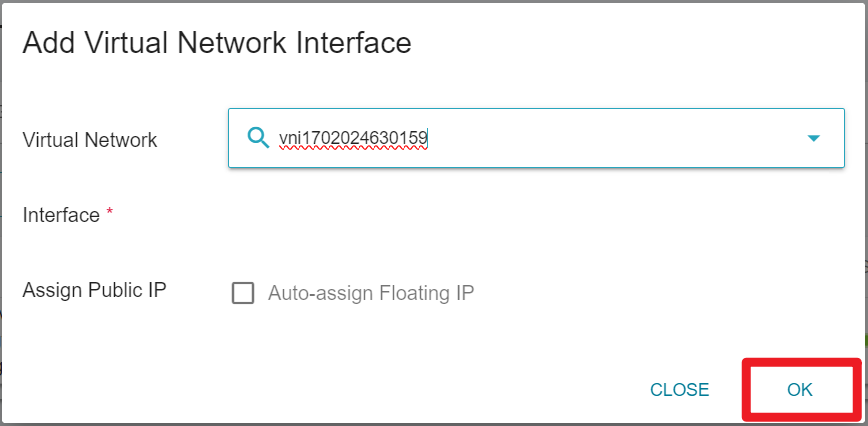
- Select an already created VNI and Public IP, click OK.
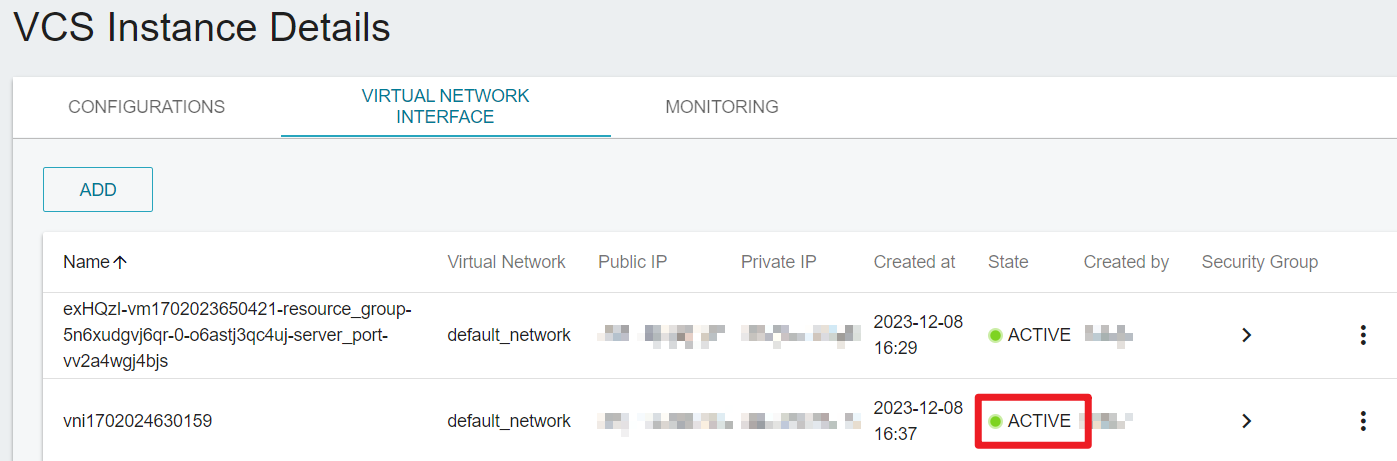
- When the VNI is successfully added, the state will become
ACTIVE.
Edit/detach/delete a VNI
- On the VCS Instance Details page, go to the VIRTUAL NETWORK INTERFACE tab, and click > DETACH or EDIT.
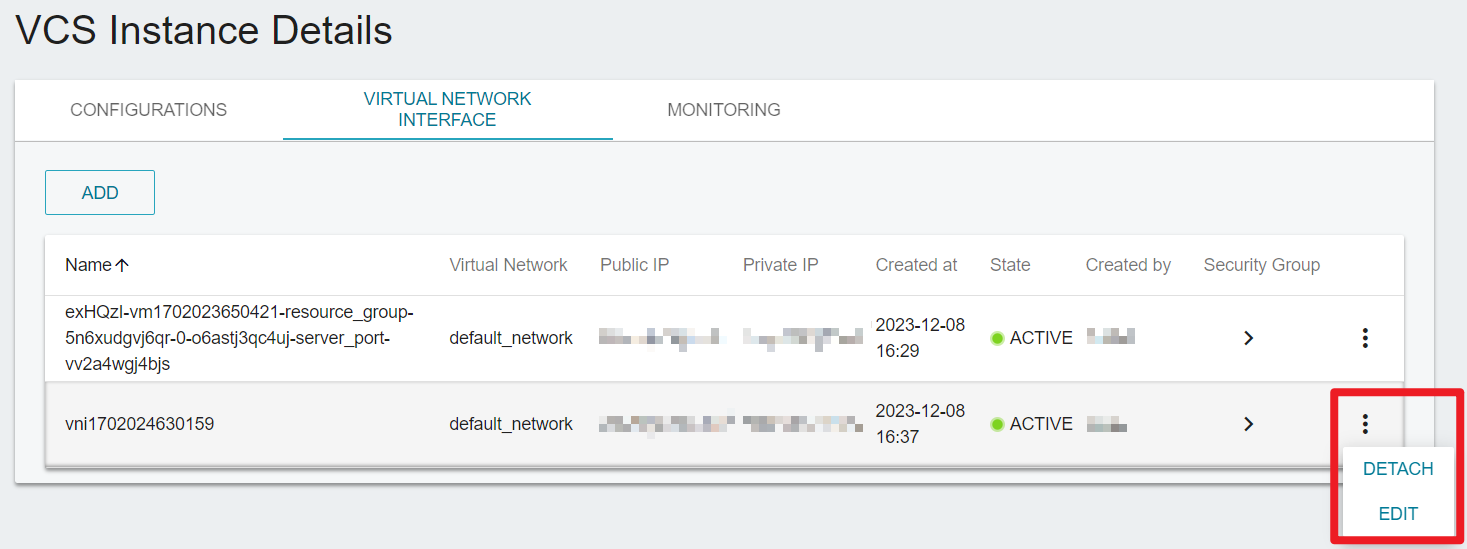
- Once detached from the instance, the VNI state will display
DOWN, and the VNI can be deleted.
When the VNI state is ACTIVE, it cannot be deleted. Please detach it from the instance first.
Manually enable VNIs within the Guest OS
If your instance is running on Ubuntu 18.04 or newer versions, and was created before December 15, 2023, this feature may not be fully supported. If you encounter issues such as VNI not being automatically enabled, connection failures or other problems, and the issue persists after executing the following commands, please contact TWSC technical support: isupport@twcc.ai.
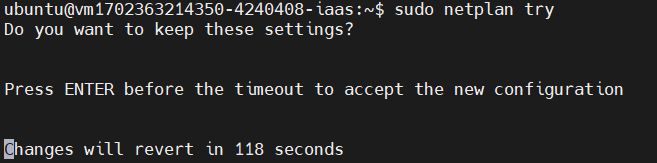
- Enter the following commands in the Guest OS. (Using commands that work on Ubuntu as an example.)
# sudo curl -L -o /etc/netplan/01-netcfg.yaml https://raw.githubusercontent.com/twcc/multivif/main/01-netcfg.yaml
# sudo netplan try
After executing sudo netplan try to apply the configuration, a countdown of 120 seconds will appear. Pressing Enter within this time frame will retain the configuration. If Enter is not pressed, the configuration will not be retained, and you can make further adjustments.
Supported and unsupported OS image versions
Some OS image versions require manual configuration to enable the VNI feature. For more information on the supported and unsupported versions, please refer to the list below.
Click here for more details
- Ubuntu 18.04 or newer, and the instance is created before 15 December, 2023.
- CentOS 7.9
- Ubuntu 18.04 or newer, and the instance is created after 15 December, 2023.
- CentOS 8.5
- Rocky
- Windows Server