HowTo: Add instances to the protected scope via a jump server
Prerequisites
If you want to add VCS instances to the protected scope via a jump server, please create the following resources before you create an Advanced Virtual Firewall:
- Create 2 virtual networks: a trusted network and an untrusted network

- Create VCS instances: a jump server and instances to be secured (select the trusted network to create these instances)

- Advanced Virtual Firewall controls access to 3 networks:
- Trusted network: the network that the jump server and secured instances are created with.
- Untrusted network: the external network for the firewall.
- Management network: The management network will be created automatically with the firewall. You can manage the firewall through this network.
- Jump server: an instance used to connect to secured instances without public IPs.
Add instances to the protected scope via a jump server
When you complete the above prerequisites, create an Advanced Virtual Firewall, and follow the steps below (example OS: Ubuntu) to add your VCS instances and enable firewall protection.
- Add the downloaded key pair to the jump server from your local machine
scp -i [Key Pair name].pem [Key Pair name].pem ubuntu@[jumpserver public ip]:/home/ubuntu/
- Connect to the jump server from your local machine, change the permission of the key, and test the connection with the secured instances
ssh -i [Key Pair name].pem ubuntu@[jumpserver public ip]
ls
sudo su -
chmod 400 [Key Pair name].pem
ssh -i [Key Pair name].pem ubuntu@[private ip of instance1 to be secured] hostname
ssh -i [Key Pair name].pem ubuntu@[private ip of instance2 to be secured] hostname
Set the default gateway of secured instances to point to the firewall
Traffic will pass through the firewall before reaching the secured instance with this setting.
- Enter information to connect to a secured instance
ssh -i [Key Pair name].pem ubuntu@[private ip of instance to be secured]
- Install net-tools and view the current routing default gateway
apt install net-tools
route -n

- Edit
rc-local.service
echo -e '\n[Install]\nWantedBy=multi-user.target\nAlias=rc-local.service\n' >> /lib/systemd/system/rc-local.service
cat /lib/systemd/system/rc-local.service
- Add
/etc/rc.local, and allow executable permissions
echo -e '#!/bin/sh -e\nsudo route add default gw [Private IP of firewall trusted network]\nsudo route del default gw [original default gateway]\nexit 0' > /etc/rc.local
chmod +x /etc/rc.local
chown ubuntu:ubuntu /etc/rc.local
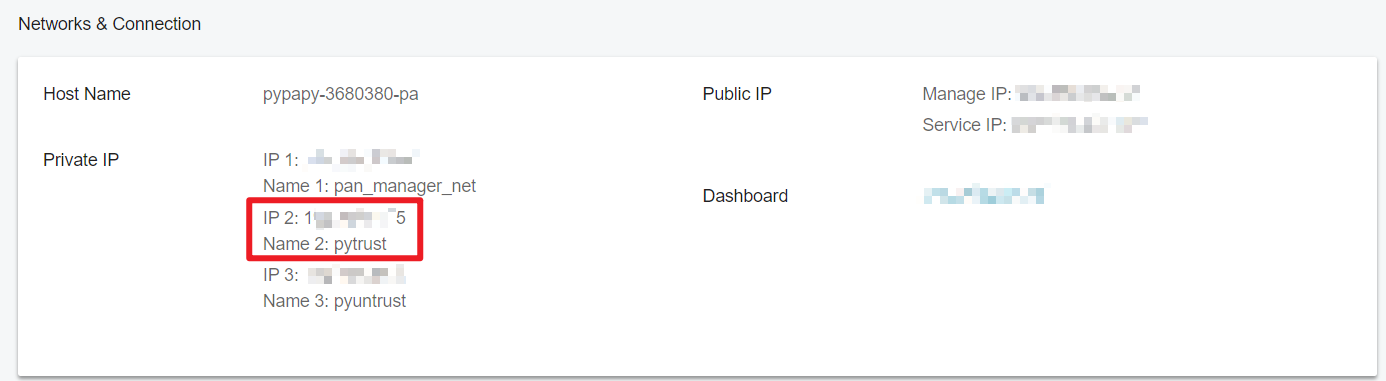
You can get the Private IP of firewall trusted network on Advanced Virtual Firewall Details page:
- Enable and start rc-local service
sudo systemctl enable rc-local
sudo systemctl start rc-local
- Create a soft link and reboot the instance
sudo ln -s /lib/systemd/system/rc-local.service /etc/systemd/system/rc-local.service
sudo reboot
Returning file exists means the soft link was created. Skip to the next step to reboot your instance.
sudo reboot
- Connect to the secured instance again and check the results
ssh -i [Key Pair name].pem [Key Pair name].pem ubuntu@[private ip of instance to be secured]
route -n
The changed default gateway will point to the firewall.